
Appetizers
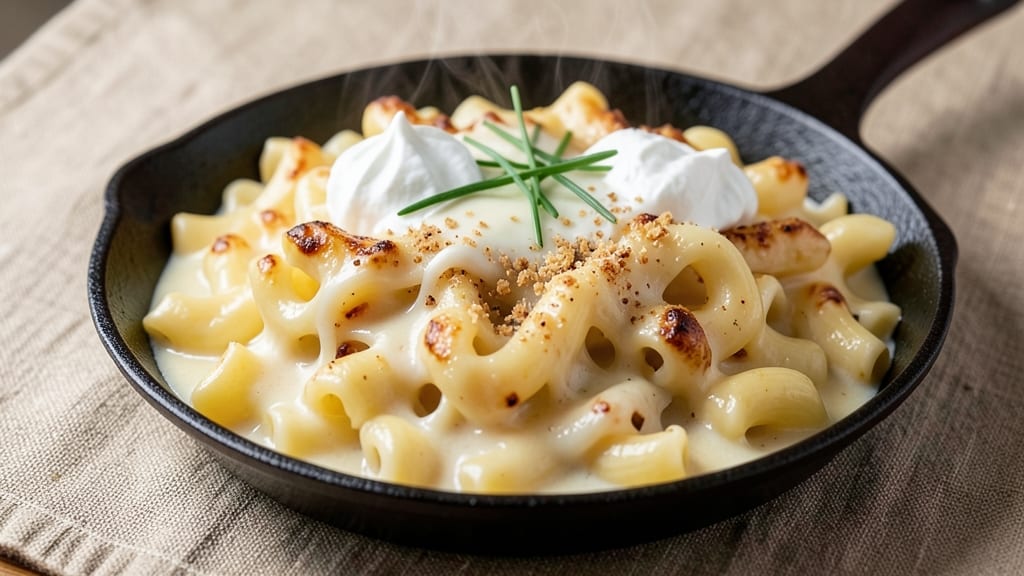
This 54th Street Mac and Cheese recipe delivers the iconic restaurant experience with a velvety cheese sauce and crispy breadcrumb topping you can make at home. The secret lies in a slow-cooked roux that creates a rich, creamy base without breaking, while the breadcrumbs add the perfect textural contrast.
I've perfected this version after years of testing—it's the one that finally convinced even the most skeptical mac and cheese lovers to ditch the boxed stuff.
The foundation starts with a proper cheese sauce made from sharp cheddar, Gruyère, and cream cheese, simmered until silky smooth. What sets this apart is the baking step—it transforms the sauce into something even more luxurious, with a golden, bubbling crust that's impossible to resist.
The breadcrumbs on top add a satisfying crunch that cuts through the richness, creating the perfect balance of textures.
By the time it emerges from the oven, you'll have a dish that's restaurant-quality in every bite—creamy, cheesy, and with that signature crispy finish. The sauce clings to each noodle, while the breadcrumbs stay perfectly crunchy.
This is the kind of mac and cheese that disappears faster than you can say "second helping."
Perfect for feeding a crowd or meal prepping for the week, this recipe delivers consistent results every time. The slow cooking ensures the sauce never breaks, and the baking step adds that extra layer of flavor and texture that makes it unforgettable. Let's get started—your taste buds will thank you.
Ingredients for 54th street mac and cheese
The secret to this iconic 54th Street Mac and Cheese is in the cheese sauce and crispy breadcrumb topping.
| Ingredient | Amount | Notes |
|---|---|---|
| Elbow Macaroni 🍝 | 2 lbs | Dry, medium or elbow shape |
| Sharp White Cheddar Cheese 🧀 | 2 cups | Shredded, block preferred |
| Gruyère Cheese 🧀 | 1 cup | Shredded, aged for depth |
| Cream Cheese 🧈 | 8 oz | Full-fat, room temperature |
| Unsalted Butter 🧈 | ¾ cup | Cold, cut into pieces |
| All-Purpose Flour 🌾 | ½ cup | For roux, sifted |
| Heavy Cream 🥛 | 1 ½ cups | Full-fat, cold |
| Whole Milk 🥛 | ½ cup | Room temperature |
| Garlic Cloves 🧄 | 4 cloves | Minced, fresh preferred |
| Panko Breadcrumbs 🍞 | 1 ½ cups | Japanese-style, for topping |
| Dried Mustard Powder 🌶️ | 1 tsp | Adds depth, optional |
| Salt 🧂 | 1 ½ tsp | Kosher preferred, adjust to taste |
| Ground Black Pepper 🌶️ | ½ tsp | Freshly ground |
| Nutritional Yeast 🍃 | 2 tbsp | For umami boost, optional |
The cheeses are what make this mac and cheese legendary. Sharp white cheddar brings the tang, while Gruyère adds that nutty depth you taste in the best restaurant versions. I grab Kraft sharp cheddar for the cheddar—it's the closest to what they use in the restaurant—and Whittard of Chelsea Gruyère if I'm feeling fancy, but any good-quality shredded Gruyère works. The cream cheese? Philadelphia full-fat is non-negotiable—it's the secret to that velvety texture. For the butter, Plugrá is my go-to, but any good unsalted butter will do. The key is keeping it cold when you add it to the roux, so it melts slowly and creates those little flavor pockets.
No sharp cheddar? Extra-sharp cheddar at half the amount works in a pinch, but it'll be less tangy. Gruyère hard to find? Parmesan mixed with a little white cheddar gives you some of that same sharpness. The panko breadcrumbs are essential for that crispy topping—Japanese-style panko stays crispier than regular breadcrumbs. If you can't find it, regular breadcrumbs toasted in the oven for 5 minutes will work, but it won't be quite as good. The mustard powder is optional but adds that little kick that makes this taste like the real deal. And if you're out of heavy cream, half-and-half works in a bind, though the sauce won't be quite as rich.
This mac and cheese tastes even better the next day—honestly, it's worth making ahead. Store leftovers in an airtight container for up to 5 days, or freeze portions for 3 months. The breadcrumb topping stays crispy for about 2 days if you reheat it in the oven at 350°F for 5 minutes. For meal prep, I make a double batch and portion it into individual containers so I can just pop them in the microwave when I'm ready to eat. The sauce thickens as it cools, so a splash of milk when reheating helps bring it back to that perfect creamy consistency.
Why You'll Love This Recipe
- No Fuss, Big Payoff: I swear by this one—just boil the pasta, melt the butter, and fold in that perfect cheese blend of sharp white cheddar, Gruyère, and cream cheese. The magic happens in the last five minutes, no fancy techniques needed.
- Three-Cheese Obsession: That first bite of creamy, melty Gruyère with the sharp kick of white cheddar? It’s the kind of flavor combo that makes you forget to breathe. The cream cheese ties it all together—rich, velvety, and impossible to resist.
- Weeknight & Potlucks: Between us, this is my go-to for lazy nights and holiday gatherings. Serve it as a side for steak night or let it be the star—it’s always a hit. (Yes, even on a Tuesday night.)
- Leftovers That Don’t Suck: Most mac and cheese gets rubbery the next day. Not this one. The Gruyère keeps it luscious, and I’ve reheated slices straight from the fridge for days. Budget-friendly? Absolutely. Reliable? You bet.
Step-by-step instructions for 54th Street mac and cheese
This baked mac and cheese delivers that perfect creamy sauce with a golden, crispy breadcrumb topping every time.
Cook the Macaroni to Al Dente Perfection
Bring a large pot of water to a rolling boil and add the 2 lbs elbow macaroni. Cook until 1 minute before the package directions specify for al dente—this ensures it finishes cooking perfectly in the oven. I like to taste-test a piece; it should have a slight bite but still be tender. Drain the pasta and return it to the pot, shaking to remove excess water. This step is crucial because any remaining water will dilute your rich cheese sauce later.
While the pasta cooks, I always keep a measuring cup nearby to reserve 1 cup of pasta water. This starchy liquid is your secret weapon for creating a silky, velvety sauce. Keep it warm until you need it—usually around Step 3.
Build the Ultimate Cheese Sauce
In a large Dutch oven or heavy saucepan, melt the 0.75 cup unsalted butter over medium heat. Once fully melted, whisk in the 0.5 cup all-purpose flour to form a roux. Cook for 2-3 minutes until it turns a pale golden color—this is your flavor foundation. Don't let it brown or it'll taste bitter.
Gradually whisk in the 1.5 cups heavy cream and 0.5 cup whole milk, ensuring no lumps form. Bring to a gentle simmer and cook for 5 minutes until slightly thickened. Reduce heat to low and stir in the 2 cups sharp white cheddar cheese, 1 cup gruyère cheese, 8 oz cream cheese, 4 minced garlic cloves, 1 tsp dried mustard powder, 2 tbsp nutritional yeast, 1.5 tsp salt, and 0.5 tsp ground black pepper. Stir constantly until completely melted and smooth—this should take about 5 minutes. The sauce should be thick enough to coat the back of a spoon but still flow easily.
Combine Pasta and Sauce
Add the cooked macaroni to the cheese sauce and stir gently to coat every strand. If the sauce looks too thick, add pasta water 1 tablespoon at a time until it reaches a creamy consistency. The mixture should be thick but still coat the pasta beautifully. I like to taste at this stage—this is where you can adjust seasoning if needed. The cheese should be rich and tangy, with a subtle garlic and mustard depth.
Transfer the entire macaroni and cheese mixture to a 9x13-inch baking dish, spreading it evenly. The dish should be about ¾ full—this gives the breadcrumbs room to crisp without overflowing.
Create the Crispy Topping
In a small bowl, mix together the 1.5 cups panko breadcrumbs with 1 tablespoon melted butter (reserved from Step 2). Sprinkle this mixture evenly over the top of the macaroni, pressing down gently with a spatula. This ensures maximum contact for that perfect golden crust. For extra flavor, I like to sprinkle an additional ¼ cup shredded cheddar cheese on top before baking.
Bake at 375°F for 25-30 minutes until the top is deep golden brown and the edges are bubbling. The center should still be warm but not jiggly—this indicates the pasta is perfectly cooked through. If the top browns too quickly, tent loosely with foil for the last 5 minutes to prevent burning.
Rest and Serve with Confidence
Remove from the oven and let the mac and cheese rest for 10 minutes before serving. This resting period allows the sauce to set slightly and the flavors to meld together. The crispy breadcrumb topping will firm up as it cools, creating that satisfying contrast with the creamy interior.
Serve immediately with a side of steamed broccoli or a simple green salad. Each bite should deliver that perfect balance of creamy, cheesy goodness with a satisfying crunch on top. The sharp white cheddar and gruyère create a complex flavor profile, while the mustard powder adds just the right amount of tang. This is comfort food at its finest!
Pro Tips For Making 54th Street Mac And Cheese
- Melt Cheese Slowly: I learned this the hard way—dumping all the cheese into the pot at once makes it seize up like a stubborn mule. Instead, add the sharp white cheddar and Gruyère in batches while stirring like you’re trying to win a race against lumps. The cream cheese goes in last, just off the heat, or it’ll turn into a greasy mess.
- Toast the Pasta: Skip the bland, soggy pasta by toasting the elbows in butter for 2-3 minutes before adding milk. This isn’t about browning—just drying the surface so the cheese clings like it’s glued on. (Yes, even if you’re impatient like me, resist the urge to rush this.)
- Shred Cheese Fresh: Pre-shredded cheese is coated with anti-caking agents that make your sauce grainy and watery. Grate your own sharp cheddar and Gruyère on a box grater—it’s a little extra work, but the texture is smoother and the flavor richer. (Your future self will thank you.)
- Use Full-Fat Butter: Low-fat or plant-based butter substitutes will make your sauce break and turn rubbery. Stick with unsalted butter—it’s non-negotiable for that creamy, velvety finish. If you’re worried about salt, adjust it later, but don’t skimp on the fat.
Regional styles of this 54th street mac and cheese
New York City Classic
This iconic version from 54th Street in Manhattan is all about that perfect balance of creamy cheese sauce and crispy breadcrumb topping. The original recipe relies on a sharp white cheddar base with Gruyère for that nutty depth, creating a sauce so rich it practically melts in your mouth.
The secret? A slow-cooked roux that prevents the sauce from breaking, even when baked. I've made this version countless times, and the key is never rushing the cooking process—patience is what makes it taste like the real deal. 🧀
Texas-Style Twist
For a Southern-inspired variation, swap the panko breadcrumbs for a crispy fried onion topping—think 1 cup thinly sliced yellow onions fried in butter until golden. Add a dash of smoked paprika and 2 tbsp hot sauce to the cheese mixture for a kick.
The result is a creamy, slightly spicy mac and cheese with a crunchy, caramelized onion crust. This version is perfect for those who love a little heat with their comfort food. 🌶️
Chicago Deep Dish
Inspired by Chicago's famous deep-dish pizzas, this version uses a thick layer of cheese sauce baked in a 9-inch cast-iron skillet instead of a baking dish. Press the macaroni into the skillet like a pie, then top with an extra layer of cheese and breadcrumbs.
Bake at 375°F for 20 minutes until the edges are golden and bubbly. The result is a hearty, single-serving dish with a crispy crust and gooey center—ideal for feeding a crowd or meal prepping. 🍴
Buffalo Chicken Fusion
For a spicy, tangy twist, fold 1 cup cooked shredded chicken into the cheese sauce and top with a buffalo sauce and blue cheese crumb mixture.
Mix 1 tbsp buffalo sauce with ½ cup crumbled blue cheese and ½ cup panko, then sprinkle over the baked mac and cheese. Broil for 2-3 minutes at the end for extra crispiness.
This fusion dish brings the bold flavors of Buffalo wings to your mac and cheese—perfect for game day or a spicy dinner. 🔥
Vegetarian Protein Boost
To make this dish more substantial for vegetarians, stir in 1 cup cooked lentils or chickpeas along with the pasta. For extra richness, add ½ cup white beans for creaminess. The lentils soak up the cheese sauce beautifully, making each bite heartier.
This version is packed with plant-based protein while keeping all the creamy, cheesy goodness intact. It’s a great way to satisfy even the pickiest eaters. 🌱
Nutrition facts
Frequently asked questions
Why does this mac and cheese need to bake instead of just simmering?
The baking step transforms the dish into something restaurant-quality. Heat from the oven creates a golden, crispy breadcrumb topping while melting the cheeses into a velvety sauce that clings perfectly to the pasta. Without baking, you'd miss that signature texture contrast and depth of flavor that makes this version special.
Can I make this mac and cheese ahead of time?
Assemble the dish up to 24 hours ahead and refrigerate it uncovered. When ready to bake, cover with foil and bake at 375°F for 30-35 minutes (5-10 minutes longer than fresh). The breadcrumbs may need extra time to crisp up. For best results, add fresh breadcrumbs after baking if making ahead.
What's the best way to reheat leftovers?
For the crispiest results, transfer leftovers to an oven-safe dish and bake at 350°F for 10-15 minutes until heated through. If using the microwave, cover with a damp paper towel and heat in 30-second intervals, stirring between each. Add a splash of milk if the sauce seems too thick after reheating.
Can I substitute regular breadcrumbs for panko?
While panko gives the best crispy texture, regular breadcrumbs will work in a pinch. Toast them in a dry skillet over medium heat for 3-4 minutes before using, and add an extra 1 tablespoon of melted butter to help them crisp up. The texture won't be quite as light, but it'll still add that satisfying crunch.
What if my cheese sauce breaks or becomes grainy?
This usually happens when cheese is added too quickly or the sauce is overheated. To fix it, immediately remove from heat and whisk vigorously while adding 1 tablespoon of cold milk or cream at a time. For stubborn graininess, strain the sauce through a fine-mesh sieve. To prevent it, always melt cheeses over low heat and stir constantly.