
Main Courses
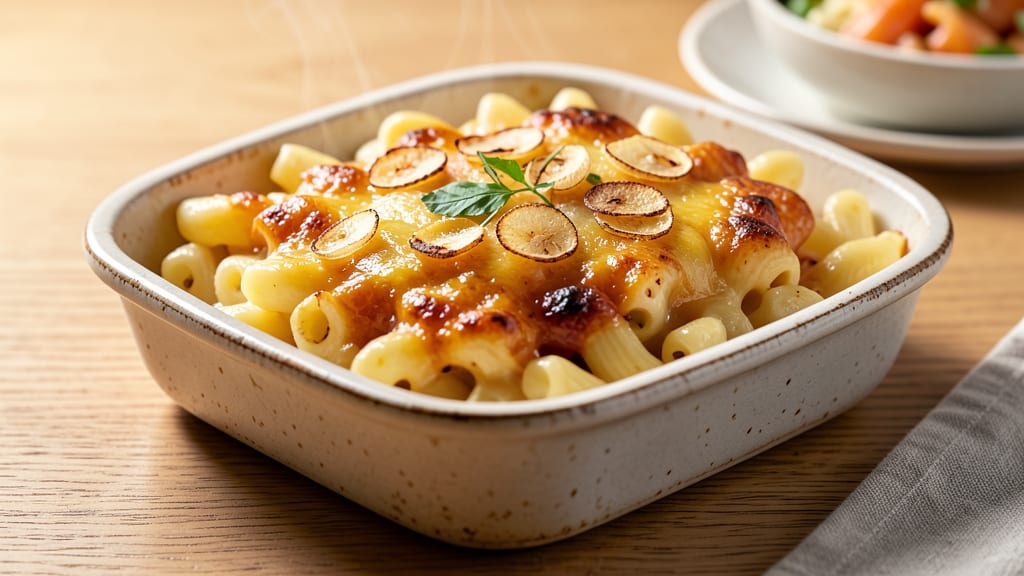
This Filipino-style baked mac and cheese delivers the perfect balance of crispy golden edges and a silky, melt-in-your-mouth stretch—with a flavor twist inspired by Filipino comfort food. 🔥 The secret lies in using a blend of cheddar and Edam (or local cheeses) for that signature tangy richness, while a breadcrumb topping adds satisfying crunch.
I developed this recipe after craving the familiar cheesy goodness but wanting to infuse it with the bold, savory notes I grew up loving.
The magic happens in the oven, where the mac and cheese transforms into a restaurant-quality dish with a crispy top and creamy interior. Unlike traditional recipes, this version incorporates garlic and a touch of chili for depth, making every bite more dynamic.
The dish is foolproof—just assemble, bake, and enjoy—while still feeling like a special occasion meal. Whether you're feeding a family or hosting friends, this recipe always gets rave reviews.
What sets this apart is the textural contrast—the crispy, caramelized top gives way to a stretchy, velvety cheese that clings to every noodle. The aroma alone will have everyone gathering around the table, and the first bite delivers that satisfying mix of comfort and excitement.
It’s the kind of dish that feels indulgent yet simple to prepare, making it perfect for weeknights or gatherings.
Ready to elevate your mac and cheese game? This recipe scales beautifully for crowds and reheats just as well the next day. The best part? You can customize it with your favorite toppings—think crispy fried shallots, extra chili flakes, or a sprinkle of parsley. Let’s get started!
Ingredients for baked mac and cheese filipino
Crispy, cheesy, and packed with Filipino flavor—these ingredients transform ordinary mac and cheese into something extraordinary.
| Ingredient | Amount | Notes |
|---|---|---|
| Elbow Macaroni 🍝 | 12 oz | Dry, medium or short elbow |
| Sharp White Cheddar Cheese 🧀 | 2 cups | Shredded, block preferred |
| Edam Cheese 🧀 | 1 cup | Shredded, or local Filipino cheese |
| Heavy Whipping Cream 🥛 | 1 cup | Full-fat for creaminess |
| Whole Milk 🥛 | ½ cup | Warmed for smooth sauce |
| Unsalted Butter 🧈 | 4 tbsp | Melted, salted butter works too |
| Garlic Cloves 🧄 | 4 cloves | Minced, fresh preferred |
| White Onion 🧅 | 1 whole | Medium size, finely diced |
| Dried Chili Flakes 🌶️ | 1 tbsp | Adjust for heat preference |
| Panko Breadcrumbs 🍞 | ½ cup | For crispy topping |
| All-Purpose Flour 🌾 | ¼ cup | For breadcrumb mix |
| Salt 🧂 | 1 ½ tsp | Kosher or sea salt |
| Black Pepper 🌶️ | ½ tsp | Freshly ground preferred |
The cheeses are the stars here. Sharp white cheddar gives that classic tang, while Edam (or any local Filipino cheese like keso) adds that signature richness. Grab pre-shredded if you're in a hurry, but block cheese grated fresh melts so much better. For the garlic and onion, fresh is non-negotiable—dried powders just won't cut it. I usually grab my garlic from Trader Joe's because it's always fresh, and the onions from the store's produce section where they're usually the sweetest. The chili flakes? Penzeys has the best quality, but any good brand works—just taste first.
No Edam? Extra sharp cheddar plus a splash of buttermilk mimics that tangy depth. Running low on panko? Toasted breadcrumbs from a baguette work in a pinch—just pulse them in the food processor for finer texture. Fresh out of garlic? Garlic powder at half the amount, but it won't be as bold. The heavy cream is crucial for that silky stretch—half-and-half works but won't be as rich. And if you're feeling fancy, swap the regular milk for whole coconut milk for a tropical twist that still keeps that creamy texture. The butter? Melt it gently over low heat so it doesn't burn.
This reheats like a dream—honestly, it's even better the next day once everything melds together. Store leftovers in an airtight container for up to 4 days, or freeze portions for 3 months. Pro tip: Make a double batch and freeze half. The crispy topping gets softer when reheated, so bake fresh portions for maximum crunch. And if you're prepping ahead? Assemble everything except the breadcrumb topping, refrigerate overnight, then bake straight from the fridge for 10-15 minutes extra at 375°F—it comes out even more golden.
Why You'll Love This Recipe
- One-Pot Magic: I swear by this recipe because it’s literally one bowl, one pan, no fuss. Toss the cooked pasta with shredded cheddar, Edam, and that rich cream-milk mix—then bake. No boiling over, no sticking, just golden perfection with zero cleanup. (Yes, even on a Tuesday night.)
- Cheese Love Bomb: That Edam and cheddar combo? Next-level. The Edam adds a caramelized crunch while the cheddar melts into gooey, stretchy bliss—like a hug in cheesy form. Between us, the first bite makes me forget I’m not at a fancy dinner.
- Weeknight Workhorse: This dish is my secret weapon for potlucks, game days, or lazy Sundays. Double the recipe, bake it ahead, and reheat slices straight from the freezer—crispy edges every time. Honestly, it’s the only baked mac that doesn’t taste sad the next day.
- Budget Cheat Code: Sharp cheddar and Edam stretch further than you’d think, and elbow mac is dirt cheap. A single batch feeds four for under $8, yet it feels like a restaurant dish. Not the prettiest, but the taste makes up for it—and my wallet thanks me.
Step-by-step instructions for baked mac and cheese Filipino recipe
Here's how to make this dreamy, crispy-topped mac and cheese that'll have everyone begging for seconds.
🍳 Step 1: Cook the Pasta to Perfect Al Dente
Bring a large pot of water to a rolling boil and add 1 teaspoon of salt (about 1.5 teaspoons total when combined with the cheese sauce). Add the 12 oz elbow macaroni and cook until 1 minute before the package instructions say al dente. You want it to finish cooking in the oven for maximum creaminess.
Drain the pasta in a colander, then immediately rinse under cold water for 10 seconds to stop the cooking process. Shake the colander vigorously to remove excess water—this prevents a watery sauce. Transfer the drained pasta to a large bowl and set aside. Here's the thing—don't skip the cold water rinse. It makes a HUGE difference in the final texture.
🍳 Step 2: Build the Ultra-Creamy Cheese Sauce
In the same pot you cooked the pasta, melt 4 tablespoons unsalted butter over medium heat. Add the finely diced white onion and minced garlic cloves, cooking for 3-4 minutes until the onion softens and becomes translucent. You'll smell that gorgeous garlic aroma—this is where all the flavor starts.
Reduce heat to low and stir in the 2 cups sharp white cheddar cheese and 1 cup Edam cheese (or local Filipino cheese). Let the cheese melt completely, stirring constantly to prevent burning. Once fully melted, remove from heat and stir in the 1 cup heavy whipping cream and 0.5 cup warmed whole milk. The sauce should be silky smooth—if it's too thick, add a splash of pasta water to loosen it.
🥘 Step 3: Combine Pasta and Sauce for Maximum Cheese Pull
Add the cooked pasta to the cheese sauce and mix thoroughly until every noodle is coated. The mixture should look like a thick, stretchy cheese sauce with visible pasta pieces. Taste and adjust seasoning with 0.5 teaspoon black pepper and any additional salt if needed. This is where the magic happens—the cheese should pull and stretch when you drag a fork through it.
Transfer the pasta mixture to a 9x9-inch baking dish (or similar size). I like to use a greased dish for easy removal, but you can also use parchment paper for a cleaner transfer. Spread it out evenly so the top will crisp properly. The reason we use elbow macaroni is that its shape holds up better to baking than long noodles.
🔥 Step 4: Create the Crispy Topping
In a small bowl, mix together the 0.5 cup panko breadcrumbs, 0.25 cup all-purpose flour, 1 tablespoon dried chili flakes, and 0.5 teaspoon black pepper. Sprinkle this mixture evenly over the top of the mac and cheese, pressing down gently with your fingers so it sticks. This crispy topping is what makes this recipe special—don't skip it!
Bake at 375°F for 20-25 minutes until the top is deep golden brown and the edges are bubbling. You'll see that gorgeous crispy crust forming—this is your signal that it's ready. If you're worried about burning, tent with foil for the last 5 minutes if needed. The internal temperature should reach 165°F.
⏰ Step 5: Rest and Serve with Confidence
Remove from the oven and let the mac and cheese rest for 5-10 minutes before serving. This resting time allows the cheese to set slightly and makes it easier to slice. The crispy topping will firm up as it cools, but it'll still be crunchy when you cut into it.
Serve immediately with a side of steamed vegetables or a simple green salad. The first bite should deliver that perfect combination of creamy, stretchy cheese with a crispy, slightly spicy topping. Real talk: this is the kind of mac and cheese that disappears faster than you can say "second helping." Enjoy while it's hot!
Pro Tips For Making Baked Mac And Cheese Filipino
- Boil Mac First: I learned this the hard way—draining the pasta before mixing it into the cheese sauce saves you from a watery, greasy mess. The starch in pasta water helps bind the sauce, but too much turns it into soup. Drain it well, then toss with a splash of pasta water (about ¼ cup) to loosen the sauce later.
- Shred Cheese Small: Big chunks of Edam or cheddar mean uneven melting and a gritty bite. Use a box grater or pulse in a food processor until the cheese is rice-sized—this guarantees a creamy, consistent texture. (Yes, even if it looks like baby rice.)
- Temper the Cream: Cold heavy cream straight from the fridge will seize your sauce like a bad breakup. Warm it gently in a small saucepan (just until it steams, not boils) before adding it to the cheese. This keeps the sauce silky, not lumpy.
- Bake Covered, Then Uncover: Start with foil on tight to melt the cheese evenly, then remove it the last 10 minutes. This creates that golden, crispy top without burning the edges. (Pro move: Spritz the foil with oil first—it slides off easier.)
Perfect pairings for this dish
Filipino-Inspired Sides
Pair this rich mac and cheese with garlic fried rice—its savory, umami notes balance the creamy cheese beautifully.
I like to use day-old jasmine rice sautéed with 3 tbsp butter, 4 minced garlic cloves, and 1 tbsp soy sauce, finished with a sprinkle of green onions. The crispy bits add texture that mirrors the mac’s crunchy topping. 🍚
Fresh Vegetable Contrast
Brighten the plate with steamed bok choy tossed with 1 tsp sesame oil and a pinch of salt. The slight bitterness cuts through the richness, while the tender stems add a satisfying bite.
For extra flair, drizzle with a sweet chili sauce—just mix 2 tbsp ketchup with 1 tsp rice vinegar and a pinch of red pepper flakes. It’s a crowd-pleaser that elevates the whole meal.
Spicy Dipping Sauces
Serve with spicy calamansi sauce for dipping—blend ½ cup calamansi juice (or lime), 1 tbsp soy sauce, 1 tbsp honey, and 1 tsp sriracha. The tangy, spicy kick complements the mac’s depth.
For a milder option, try garlic aioli made with ½ cup mayonnaise, 1 minced garlic clove, and 1 tsp lemon juice. Both sauces add layers of flavor without overpowering the dish. 🌶️
Crunchy Toppings
Add toasted garlic fried shallots as a garnish right before serving. Slice 4 shallots thinly, fry in 3 tbsp oil until golden, then drain on paper towels. Their sharp, caramelized flavor contrasts perfectly with the creamy mac.
For extra crunch, sprinkle crushed pork rinds on top—it’s a Filipino favorite that adds a meaty texture without extra cooking. ✨
Beverage Pairings
Cool down the meal with iced calamansi tea—steep 4 tea bags in 4 cups hot water, add ½ cup calamansi juice, and chill. The citrusy brightness cleanses the palate after each bite.
For something stronger, try San Miguel Pale Pilsen—its crisp, light flavor balances the dish’s richness without competing. A non-alcoholic option? Mango juice with a splash of sparkling water adds a refreshing sweetness. 🍹
Nutrition facts
Frequently asked questions
Can I substitute Edam cheese with something else?
If you can't find Edam, use extra sharp cheddar plus 1 tablespoon buttermilk for that tangy depth. For a Filipino twist, try keso (Filipino white cheese) or Monterey Jack—both add creaminess while keeping the dish rich. The key is balancing sharpness with mildness for that perfect stretch.
Why does my mac and cheese get watery after baking?
This usually happens from overcooking the pasta or not draining it well. Always cook pasta 1 minute less than package instructions, then rinse with cold water for 10 seconds to stop cooking. Shake off excess water before mixing with cheese sauce. Another trick? Reduce milk by 2 tablespoons if your sauce seems too thin.
How do I make this extra crispy on top?
For maximum crunch, broil for 1-2 minutes at the end of baking—watch closely to avoid burning! Press the breadcrumb mix firmly into the cheese, then use a pastry brush to lightly oil the top before baking. For even more crunch, add 1 tablespoon melted butter to your breadcrumb mix. The secret? A hot oven (375°F) and patience—don't open the oven door while baking!
Can I make this ahead of time?
Yes! Assemble everything except the breadcrumb topping, then refrigerate for up to 24 hours. Bake straight from the fridge at 375°F for 30-35 minutes (add 10-15 minutes extra). For freezing, bake fully, cool completely, then wrap tightly in foil. Reheat at 350°F for 20-25 minutes—the crispy topping softens but still tastes amazing.
What's the best way to reheat leftovers?
Cover with foil and reheat in the oven at 350°F for 15-20 minutes—this keeps the center creamy. For microwave reheating, cover with a damp paper towel and zap for 1-2 minutes on medium power, then stir and let sit for 30 seconds. Pro tip: Add 1 tablespoon milk or cream when reheating to restore creaminess. Never reheat in the toaster oven—it dries out the cheese!