
Breakfast & Brunch
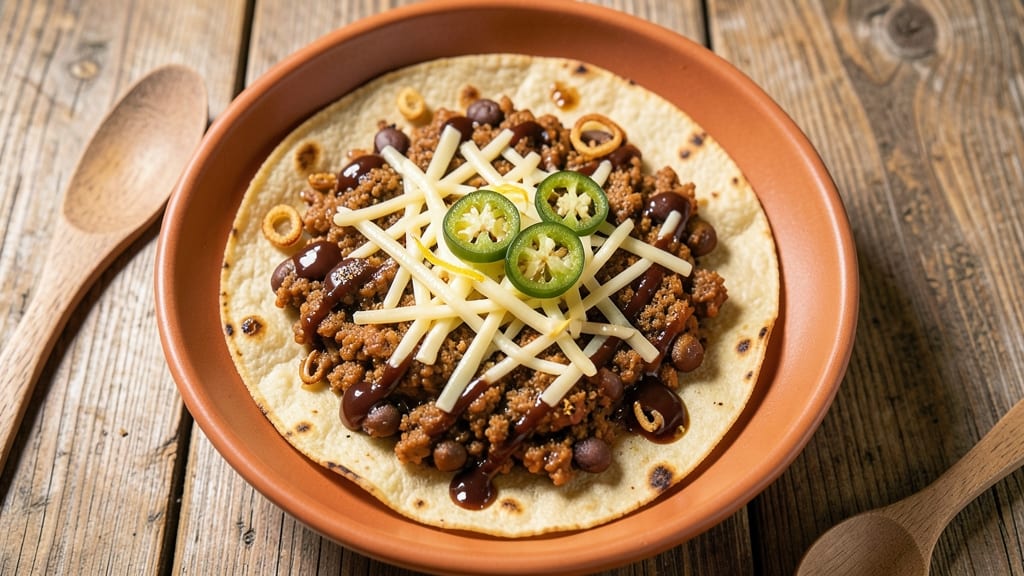
This fast bean and cheese breakfast taco recipe delivers crispy tortillas and melted queso magic in under 20 minutes—no skillet required. The secret lies in perfectly seasoned refried beans and gooey cheese that melts into a velvety blanket when wrapped in warm tortillas.
I developed this after years of weekend brunch cravings, and it’s now my go-to for hearty, plant-based mornings that don’t skimp on flavor.
The beauty of this recipe is its balance: crispy tortillas (achieved with a quick pan or oven method) paired with creamy refried beans and melted cheese create a satisfying bite every time. No fancy techniques—just simple ingredients that come together effortlessly.
The optional toppings let you customize it for spice lovers or those who prefer freshness, but even on its own, it’s a complete, protein-rich meal.
What makes this stand out is how the cheese transforms from solid to gooey when heated, creating that irresistible pull-apart texture. The beans add heartiness, while the tortillas provide the perfect vessel for all that cheesy goodness.
It’s the kind of breakfast that feels indulgent but still keeps things light—ideal for busy mornings or lazy weekends.
Ready in minutes, this recipe proves you don’t need meat or complicated steps to make breakfast feel special. Whether you’re feeding a crowd or just craving a satisfying solo meal, these tacos deliver on flavor, texture, and speed. Let’s get started!
Ingredients for bean and cheese breakfast taco
Crispy tortillas, creamy beans, and gooey cheese—this vegetarian breakfast delivers restaurant-quality tacos in minutes.
| Ingredient | Amount | Notes |
|---|---|---|
| Canned Black Beans 🫘 | 1 ½ cups | Drained and rinsed thoroughly |
| Refried Beans (Canned) 🥫 | 1 cup | High-quality, no added salt |
| Corn Tortillas 🌽 | 8 whole | Small size, 6-inch diameter |
| Shredded Monterey Jack Cheese 🧀 | 1 ½ cups | Shredded fresh for best melt |
| Olive Oil 🫒 | 2 tbsp | Extra-virgin for crispiness |
| Vegetable Oil 🫒 | 1 tbsp | For even crisping |
| Ground Cumin 🌿 | ½ tsp | Toasted for deeper flavor |
| Smoked Paprika 🌶️ | ¼ tsp | For subtle smokiness |
| Garlic Powder 🧄 | ½ tsp | Freshly ground preferred |
| Salt 🧂 | ½ tsp | Diamond Crystal kosher salt |
| Black Pepper 🌶️ | ¼ tsp | Freshly cracked |
| Lemon Juice 🍋 | 1 tbsp | Freshly squeezed |
| Fresh Cilantro 🌿 | ¼ cup | Chopped, for garnish |
| Avocado Slices 🥑 | 1 whole | Optional topping |
| Salsa 🍅 | ½ cup | Store-bought or homemade |
The cheese is the star here. Monterey Jack melts beautifully without turning rubbery, but Oaxaca or pepper jack add exciting variations. Pre-shredded cheese works, but freshly grated from a block gives that irresistible stretch. For the beans, high-quality canned refried beans (like Goya or La Preferida) make all the difference—they’re smoother and less watery. If you’re using dried beans, soak overnight and mash them thoroughly for that authentic refried texture. The tortillas? Corn tortillas are traditional, but flour works too if you prefer a softer bite.
No black beans on hand? Pinto or kidney beans work just as well—just drain and rinse them thoroughly. Short on cumin? Mexican oregano at half the amount gives a similar earthy depth. The smoked paprika can be swapped for regular paprika if you’re avoiding smoke flavor. For extra richness, add 1 tablespoon of vegan butter to the beans while warming. The lemon juice brightens everything up—don’t skip it, even if it’s just a splash. And if you’re feeling fancy, toasted pumpkin seeds add a delightful crunch as a topping.
Store pre-shredded cheese in an airtight container for up to 3 days, but freshly grated keeps best. Tortillas freeze beautifully—just wrap them in foil and thaw at room temperature before using. The refried beans can be reheated with a splash of water or broth to restore their creaminess. These tacos reheat well in a dry skillet over medium heat for 2-3 minutes per side, making them perfect for meal prep. For optimal freshness, assemble and serve immediately, but the components keep separately for 3 days in the fridge.
Why You'll Love This Recipe
- Pantry-to-Table Magic: I swear by this recipe on mornings when my fridge is nearly empty—just open a can, warm it up, and boom. The refried beans melt into the tortillas while the black beans add that satisfying texture, all without a single fresh ingredient needed.
- Cheese Pulls All The Stops: Between us, Monterey Jack isn’t fancy, but here? It gets crispy in the tortilla while staying gooey inside. That contrast—plus the smoky depth of the beans—makes every bite feel like a little victory.
- Weeknight Meal Prep Hero: I make a double batch on Sundays and store them in the fridge. Reheat in seconds, toss in a lunchbox, or freeze them for those days when I’m too tired to cook. They’re my go-to for busy mornings or after-school snacks.
- Budget Breakfast That Feeds: This recipe costs me less than $2 for six tacos—way cheaper than eggs or bacon. The canned beans and cheese stretch forever, and I never feel like I’m sacrificing flavor. Honestly, it’s the kind of meal that makes grocery day feel like a win.
Step-by-step instructions for bean and cheese breakfast tacos
Here's how to craft perfectly crispy tortillas with melty cheese and flavorful bean fillings.
Season and Warm the Bean Mixture
In a medium bowl, combine the 1.5 cups drained and rinsed canned black beans with 1 cup refried beans. Add the 0.5 tsp ground cumin, 0.25 tsp smoked paprika, 0.5 tsp garlic powder, 0.5 tsp salt, and 0.25 tsp black pepper. Stir until all spices are evenly distributed throughout the bean mixture.
Transfer the seasoned beans to a small saucepan and warm over medium-low heat for 3-4 minutes, stirring occasionally. The mixture should reach 160°F internally - you'll know it's ready when it's heated through and fragrant. Remove from heat and stir in 1 tbsp freshly squeezed lemon juice. This brightens the flavors and prevents the beans from becoming too heavy. Keep the bean mixture warm while you prepare the tortillas.
Prepare the Cheese and Garnish Components
In a small bowl, combine 0.25 cup chopped fresh cilantro with 0.5 cup salsa. This creates your garnish mixture that will add freshness and acidity to each taco. Keep this mixture refrigerated until ready to use.
Slice the 1 whole avocado into ¼-inch thick slices and arrange them on a plate. The avocado should be at room temperature for the best texture - if it's cold from the refrigerator, let it sit for 10 minutes before slicing. The creamy texture will contrast beautifully with the crispy tortillas and melted cheese.
Create Perfectly Crispy Tortillas
Heat 2 tbsp extra-virgin olive oil and 1 tbsp vegetable oil together in a large skillet over medium-high heat until the oils shimmer and a drop of water sizzles immediately upon contact. This high heat is crucial for achieving those crispy tortillas.
Working in batches of 2-3 tortillas, carefully place the 8 whole corn tortillas in the hot oil. Cook for 30-45 seconds per side until they develop golden brown spots and become crispy. The tortillas should puff up slightly but not burn. Transfer the cooked tortillas to a paper towel-lined plate to drain excess oil and keep warm in a 200°F oven while you prepare the fillings.
Assemble the Breakfast Tacos
Working quickly, divide the warm bean mixture evenly among the 8 crispy tortillas, spreading about 2 tablespoons per tortilla. Sprinkle 3 tablespoons of shredded Monterey Jack cheese over each bean-filled tortilla. The cheese should be freshly shredded for the best melt and texture.
Fold each taco in half and press gently to help the cheese melt and bind the filling. Return the assembled tacos to the 200°F oven for 2-3 minutes until the cheese is fully melted and bubbly. This final step ensures the cheese is perfectly gooey while keeping the tortillas crispy.
Garnish and Serve Immediately
Transfer the cheese-filled tacos to serving plates and immediately top each with 1-2 avocado slices and about 1 tablespoon of the cilantro-salsa mixture. The contrast of warm, crispy tacos with cool avocado and fresh salsa creates the perfect balance of textures and temperatures.
Serve immediately while the tortillas are still crispy and the cheese is molten. These breakfast tacos are best enjoyed right away when the tortillas maintain their perfect texture and the cheese is at its most delicious, stretchy consistency. Each bite should deliver a satisfying crunch from the tortilla, creamy avocado, warm beans, and melted cheese all in one perfect package.
Pro Tips For Making Bean And Cheese Breakfast Taco
- WARM THE BEANS FIRST: Cold beans straight from the can make your tortillas soggy—trust me, I’ve ruined a batch by skipping this. Drain the black beans and heat them in a dry skillet over medium for 3-4 minutes, stirring occasionally, until they’re just warm through. The refried beans can go straight in, but don’t skip warming the black beans.
- SALT THE CHEESE: Store-bought shredded Monterey Jack is often bland, and fresh tortillas need something to cling to. Sprinkle the cheese with a pinch of salt and a tiny bit of cumin while you’re warming it—it’ll melt faster and taste better. (Yes, even if the cheese already has salt in it.)
- TOAST THE TORTILLAS: Skip the sad, limp tortilla by giving them a quick toast. Heat a dry skillet over medium-high, add each tortilla for 20-30 seconds per side until they’re just puffed and slightly crisp. Warm refried beans go in first, then cheese on top—this keeps the filling from turning the tortilla into a wet paperweight.
- LAYER CHEESE LAST: I used to pile everything on at once, and the cheese would just slide off when I flipped the taco. Instead, assemble the beans and black beans first, then fold the tortilla in half. Pop it back in the pan for 10 seconds to melt the cheese on top—now it stays put. (Bonus: use a tiny bit of olive oil to brush the tortilla before folding if you’re worried.)
Common mistakes when making perfect results
Overcooking the Tortillas
Crispy tortillas are the foundation of great tacos, but I’ve seen many people burn them by cooking too long or at too high heat. The key is 30-45 seconds per side over medium-high heat—any longer, and they’ll turn bitter and lose their delicate texture.
I recommend working in batches of 2-3 tortillas to maintain consistent heat in your pan. If your tortillas start browning too quickly, reduce the heat slightly or use a nonstick skillet for better control. 🔥
Skipping the Cheese Melt Step
Many people assemble tacos and serve them immediately, but this often results in dry, unappetizing bites. The 2-3 minute oven melt is where the magic happens—it transforms shredded cheese into that gooey, stretchy blanket that makes every bite irresistible.
If you’re short on time, try melting the cheese directly in the skillet after adding the beans, but keep the heat low to medium to avoid burning the tortillas.
Using Pre-Shredded Cheese
While pre-shredded cheese is convenient, it often contains anti-caking agents that prevent proper melting. For the best results, I always recommend grating Monterey Jack cheese fresh—it melts smoothly and creates that perfect pull-apart texture.
If you must use pre-shredded, look for brands without additives, or pulse it in a food processor to break up any clumps. A quick sprinkle of ½ tsp cornstarch can also help improve meltiness if you’re in a pinch. 🧀
Underseasoning the Beans
The beans are the heart of these tacos, and underseasoning them is a common mistake that makes the whole dish taste flat. I always toast the spices in the dry pan for 10-15 seconds before adding the beans to deepen their flavor.
Don’t be shy with the cumin, smoked paprika, and garlic powder—they’re what give the beans that authentic, savory depth. Taste as you go and adjust with a pinch of salt or a splash of lime juice if needed.
Overfilling the Tortillas
Stuffing tortillas too full leads to messy, difficult-to-eat tacos that fall apart at the first bite. Aim for about 2 tablespoons of bean mixture per tortilla, leaving room for the cheese to melt without spilling over.
When in doubt, less is more—you can always add more toppings on the side. I also recommend folding the tacos in half and pressing gently to help the filling stay contained while the cheese melts. ⚡
Not Keeping Components Warm
These tacos are best served immediately, but if you’re making them for a group, keeping everything warm is crucial. The tortillas should stay in a 200°F oven while you assemble, and the bean mixture can be kept warm in a small pot over low heat.
Cold beans and cheese will make the tacos taste bland and unappetizing. If you’re prepping ahead, assemble the tacos just before serving to maintain that perfect crispy-cheesy texture.
Nutrition facts
Frequently asked questions
Can I make these breakfast tacos with flour tortillas instead of corn?
Flour tortillas work beautifully and create a softer, more pliable texture. For best results, use medium-sized flour tortillas and reduce the cooking time to 20-30 seconds per side—they crisp up faster than corn tortillas. The cheese will melt just as well, and the slightly chewier texture pairs perfectly with the creamy beans.
What's the best way to reheat leftover bean and cheese tacos?
Reheat in a dry skillet over medium heat for 1-2 minutes per side to restore crispiness. For a softer texture, wrap them in a damp paper towel and microwave for 20-30 seconds. Avoid reheating in the oven—it can make the tortillas rubbery. Always reheat from room temperature for even cooking.
Can I make this recipe ahead of time for meal prep?
Yes, but with a few key adjustments. Prep the bean mixture and shred the cheese ahead, storing separately in airtight containers for up to 3 days. Cook the tortillas fresh or freeze them after crisping. Assemble tacos just before serving to maintain perfect texture—reheating assembled tacos can make them soggy.
What are the best cheese alternatives for dairy-free tacos?
Try vegan shredded cheddar (like Daiya) or cashew-based queso for that gooey texture. For a simpler option, use 1 cup melted vegan butter mixed with 1 tbsp nutritional yeast—it adds richness. Just note that dairy-free cheeses may not melt as dramatically, so you might need to use slightly more.
How do I keep the tortillas crispy while assembling?
Keep cooked tortillas in a 200°F oven on a wire rack (not directly on the tray) to maintain crispiness. For extra insurance, brush the insides with a tiny bit of melted butter before filling. This creates a moisture barrier that prevents sogginess while keeping the tortillas tender enough to hold the filling.