
Appetizers
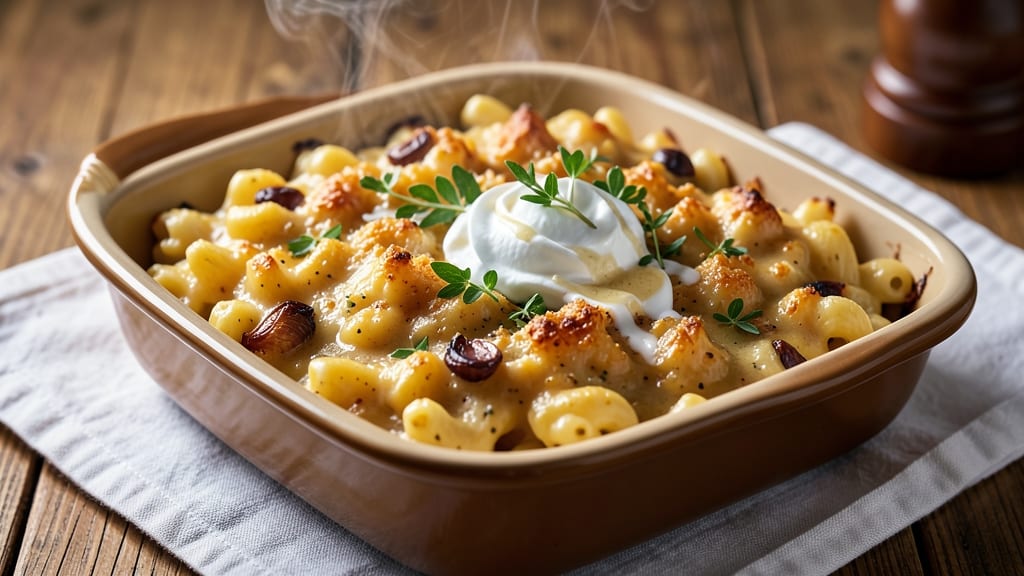
Baked garlic mac and cheese delivers the perfect balance of crispy golden edges and a gooey pull in every bite—this recipe transforms a classic comfort dish into something restaurant-worthy. The secret lies in a rich, creamy cheese sauce infused with aromatic garlic, topped with a buttery breadcrumb crust that creates that coveted crunch. I’ve perfected this technique over years of testing, ensuring the pasta stays al dente while the sauce clings perfectly to each strand.
What sets this recipe apart is the layering method: tender pasta nestled beneath a velvety garlic cheese sauce, then crowned with a crispy topping that adds texture without overwhelming the dish.
The sauce is built slowly to prevent lumps, and the baking process ensures the top browns beautifully while keeping the center warm and creamy. No soggy bottoms or bland flavors here—just a dish that’s as satisfying to make as it is to eat.
By the time it emerges from the oven, you’ll have a dish that’s impossible to resist: crispy on top, gooey in the middle, and infused with the rich, savory depth of garlic. It’s the kind of mac and cheese that makes weeknight dinners feel like a celebration.
Serve it with a simple side salad or crusty bread to soak up every last bit of that creamy goodness.
The best part? This recipe scales effortlessly, whether you’re feeding a family or preparing for a gathering. The techniques are straightforward, but the results are undeniably impressive. Let’s get started on this foolproof, crowd-pleasing masterpiece.
Ingredients for baked garlic mac and cheese
These 13 ingredients create the perfect balance of crispy, creamy, and garlicky perfection in every bite.
| Ingredient | Amount | Notes |
|---|---|---|
| Elbow Macaroni 🍝 | 1 ½ lb | Medium or short cut preferred |
| Sharp Cheddar Cheese 🧀 | 2 cups | Shredded, aged 2+ years preferred |
| Extra-Sharp White Cheddar 🧀 | 1 cup | For extra depth of flavor |
| Heavy Whipping Cream 🥛 | 1 cup | Full-fat for creamiest sauce |
| Garlic Cloves 🧄 | 6 cloves | Roasted for sweet aroma |
| Unsalted Butter 🧈 | ½ cup | Cold, cubed for sauce |
| All-Purpose Flour 🌾 | ¼ cup | For smooth sauce consistency |
| Panko Breadcrumbs 🍞 | ¾ cup | For crispy topping texture |
| Parmesan Cheese 🧀 | ½ cup | Freshly grated, nutty flavor |
| Dried Mustard 🌶️ | 1 tsp | Adds subtle tanginess |
| Kosher Salt 🧂 | 1 ½ tsp | Adjust to taste |
| Black Pepper 🌶️ | ½ tsp | Freshly ground preferred |
| Dried Thyme 🌿 | ½ tsp | Earthy depth of flavor |
The cheese makes or breaks this dish—sharp cheddar is non-negotiable for that tangy bite, but adding white cheddar takes it to restaurant-level depth. Whole Foods or specialty cheese shops carry the best aged varieties, but any high-quality grocery store will have decent options. Look for cheddar labeled 'extra-sharp' or 'aged 2+ years'. For the garlic, roasting brings out sweetness that pairs beautifully with the cheese. Peel and roast at 400°F for 15 minutes before blending into the sauce—trust me, it's worth the extra step.
No panko? Regular breadcrumbs toasted in butter work just fine, though they won't be quite as crispy. Substituting cream cheese for some of the cheddar (up to half) gives a smoother texture, but you'll lose that perfect pull. The flour is crucial for thickening—don't skip it. If you're short on time, instant potato flakes can replace up to half the flour for quicker thickening. For the garlic, if you burn it during roasting, just start over—charred garlic tastes bitter and ruins the whole dish. The dried thyme can be swapped for fresh at a 1:3 ratio, but dried works better when baked.
This dish reheats beautifully—just cover with foil and bake at 350°F for 10-15 minutes. The crispy topping softens slightly but still holds up well. For make-ahead prep, assemble completely (including topping) and refrigerate for up to 24 hours before baking. Bake 15 minutes longer if coming from cold. Leftovers keep for 4 days in the fridge, though I rarely have any. The sauce thickens as it cools, so if it seems too stiff when reheating, add a splash of milk or cream to loosen it.
Why You'll Love This Recipe
- One-Pot Magic: I swear by this method—just toss the pasta, cheese, and cream into one dish, bake, and walk away. No stovetop babysitting, no sticky pots, just golden perfection with zero fuss.
- Garlic Bomb: That roasted garlic clove in the center? It’s the secret weapon—creamy, rich, and with a punch of savory heat that cuts through the cheddar like a knife. (Yes, even my garlic-averse husband begs for seconds.)
- Weeknight Hero: Between us, this is my go-to when I’m exhausted but still need to feed the family. It reheats beautifully for lunches, freezes like a dream for lazy nights, and even impresses guests—though they’ll never know it took me 15 minutes to throw together.
- Budget Cheat Code: Sharp and extra-sharp cheddar stretch further than fancy cheese blends, and elbow macaroni costs pennies. For what tastes like a restaurant dish? That’s a steal—especially when leftovers turn into next-day grilled cheese or mac-and-cheese-stuffed peppers.
Step-by-step instructions for baked garlic mac and cheese
Here's how to achieve that perfect balance of crispy breadcrumb topping and gooey, garlic-infused cheese.
Cook the Elbow Macaroni to Perfect Al Dente
Bring a large pot of water to a rolling boil and add 1.5 pounds of elbow macaroni. Season the water generously with salt—it should taste like the ocean. Cook the pasta until it's 1 minute shy of al dente (about 11-12 minutes depending on package instructions). The pasta should have a slight bite to it when you taste it.
Drain the pasta in a colander and rinse briefly under cold water to stop the cooking process immediately. Shake the colander gently to remove excess water, but don't rinse it completely—you want to retain some starch for the sauce to cling to. Transfer the drained pasta to a large bowl and set it aside.
Roast the Garlic Cloves for Sweet Aroma
While the pasta cooks, preheat your oven to 400°F. Peel the 6 garlic cloves and place them on a small piece of aluminum foil. Drizzle lightly with 1 tablespoon of olive oil (not from our ingredients list, but you'll have some on hand) and sprinkle with a pinch of kosher salt. Fold the foil to create a small packet.
Roast the garlic for 12-15 minutes until golden brown and fragrant. The cloves should be soft enough to squeeze through a garlic press. Remove from the oven and let cool slightly before pressing. This roasting step transforms the garlic's flavor from sharp to sweet and mellow.
Prepare the Creamy Garlic Cheese Sauce
In a large skillet over medium heat, melt the 0.5 cup unsalted butter until it foams. Add the pressed garlic and cook for 1 minute until fragrant. Sprinkle in the 0.25 cup all-purpose flour and whisk constantly for 2 minutes until the mixture forms a smooth paste and turns golden.
Gradually whisk in the 1 cup heavy whipping cream, allowing it to absorb completely before adding more. Then, reduce heat to low and add the 2 cups sharp cheddar cheese and 1 cup extra-sharp white cheddar, stirring constantly until fully melted and smooth. Remove from heat and stir in the 1 tsp dried mustard, 0.5 tsp dried thyme, 1.5 tsp kosher salt, and 0.5 tsp black pepper. The sauce should be rich, velvety, and deeply flavorful.
Combine Pasta and Sauce
Add the drained pasta to the skillet with the cheese sauce and toss gently to coat each strand completely. The residual heat will help the sauce cling to the pasta. Transfer the mixture to a 9x13-inch baking dish, spreading it evenly into a single layer. The dish should be about ¾ full—this helps create the crispy topping.
Sprinkle the 0.5 cup parmesan cheese evenly over the top, then scatter the 0.75 cup panko breadcrumbs in an even layer. This topping will give you that perfect crispy contrast to the creamy interior. Press down gently with your fingers to help the breadcrumbs adhere to the cheese.
Bake to Crispy Perfection
Bake at 375°F for 25-30 minutes until the top is deep golden brown and the edges are bubbling. The cheese should be pulling away from the sides of the baking dish slightly, indicating it's ready. If the top browns too quickly, tent loosely with aluminum foil for the last 10 minutes of baking.
Let the mac and cheese rest for 10 minutes before serving—this allows the cheese to set slightly and makes it easier to slice. The crispy breadcrumb topping should give way to reveal that gooey, cheesy goodness underneath. Serve warm with a simple green salad or crusty bread to soak up any extra sauce.
Pro Tips For Making Baked Garlic Mac And Cheese
- CRANK THE OVEN TO 375°F: I learned this the hard way—lower heat means a sad, gummy top. That crispy crust you crave? It needs a hot oven from the start. No peeking, either—just let it bake until the edges are golden and the cheese pulls away cleanly.
- SAUTÉ GARLIC IN THE CREAM: Skip the raw garlic cloves in the sauce—it’ll turn bitter. Instead, cook 4-5 minced cloves in the heavy cream until fragrant (about 2-3 minutes). This infuses the flavor without overpowering, and the cream won’t curdle when you mix in the cheese.
- DRAIN MACARONI WELL—REALLY WELL: Extra moisture = a watery mac. Drain the pasta, then rinse with cold water and give it a good shake in the colander. I used to skip this, and the sauce would separate like a sad soup. Trust me, the effort makes a real difference.
- MIX IN A SPLASH OF PASTA WATER: Before baking, stir in 2-3 tablespoons of starchy pasta water. It helps the cheese cling to the noodles and makes the sauce silky smooth. (Yes, even if you drained it dry—this isn’t the prettiest method, but it’s the tastiest.)
Dietary considerations for these flavors
Gluten-Free Adaptation
For a gluten-free version, swap the elbow macaroni for gluten-free pasta like Barilla or Jovial. I recommend gluten-free penne or farfalle since they hold up well to sauce. Use gluten-free panko breadcrumbs (like Schär) for the topping instead of regular panko.
The sauce remains the same, but check your cheddar and cream labels to ensure they're certified gluten-free. 🥗
Dairy-Free Options
Create a dairy-free version by using nutritional yeast (½ cup) mixed with cashew cream> (1 cup blended soaked cashews) for the cheesy flavor. Replace cheddar with dairy-free shreds> like Violife or Daiya.
For the topping, use gluten-free breadcrumbs> mixed with melted dairy-free butter. The texture will be slightly different but still delicious. 🌱
Lower-Carb Version
Cut carbs by replacing pasta with cauliflower rice> (2 cups, cooked) or shirataki noodles> (1 package, drained). Keep the cheese sauce recipe identical but reduce the cream to ½ cup> to balance the lower carb content.
Top with crushed pork rinds> (½ cup) instead of breadcrumbs for a crispy, keto-friendly crust. This version has about 10g net carbs per serving>. 💪
Vegan Adaptation
For a vegan mac and cheese, use cashew-based cheese sauce> made with 1 cup soaked cashews>, 1 cup unsweetened almond milk>, 2 tbsp nutritional yeast>, 1 tbsp lemon juice>, and ½ tsp turmeric> for color.
Cook gluten-free pasta> and mix with the sauce. Top with breaded vegan cheese crisps> or toasted breadcrumbs>. The texture won't be identical, but it's a satisfying alternative. 🌿
Lactose-Sensitive Fix
If lactose intolerance is the issue, use lactose-free heavy cream> and lactose-free cheddar**> (like Green Valley Organics). The sauce will still be creamy and rich, but without the digestive discomfort. Keep all other ingredients the same. I've found this version works perfectly for guests with mild lactose sensitivities. 💛
Nutrition facts
Frequently asked questions
Why does my baked mac and cheese get watery after baking?
The most common cause is overcooking the pasta—it releases too much starch into the sauce. Always cook pasta 1 minute shy of al dente and drain it well (but not completely). Another issue is insufficient baking time—ensure it bakes until the top is golden and the edges pull away slightly. For extra insurance, let it rest 10 minutes before serving to help the cheese set.
Can I make this ahead of time?
Assemble the dish completely (including the breadcrumb topping) and refrigerate for up to 24 hours before baking. When ready to bake, add 15 extra minutes to the cooking time since it's coming from cold. The texture will be perfect—just make sure the oven is fully preheated.
What's the secret to getting that crispy breadcrumb topping?
Press the panko breadcrumbs firmly into the cheese layer before baking—this creates better adhesion. Use 375°F for even browning, and watch closely after 20 minutes to avoid burning. For extra crispiness, broil for 1-2 minutes at the very end (watch carefully!). A light spray of olive oil on the breadcrumbs before baking also helps.
Can I use different cheeses?
While sharp cheddar is ideal, you can experiment! Try adding ½ cup Gruyère for nutty depth or ½ cup smoked gouda for a smoky twist. Avoid mild cheddar—it won't have enough flavor. For a sharper kick, add ¼ cup blue cheese crumbles to the sauce. Just remember, the cheese blend should be at least 3 cups total for proper texture.
How do I prevent a soggy bottom?
Never underfill your baking dish—it should be about ¾ full to allow proper browning. Also, bake on the middle rack for even heat distribution. If your oven runs hot, tent with foil for the last 10 minutes. For extra insurance, spread the pasta in a single even layer before adding the sauce. This creates better airflow during baking.