
Appetizers
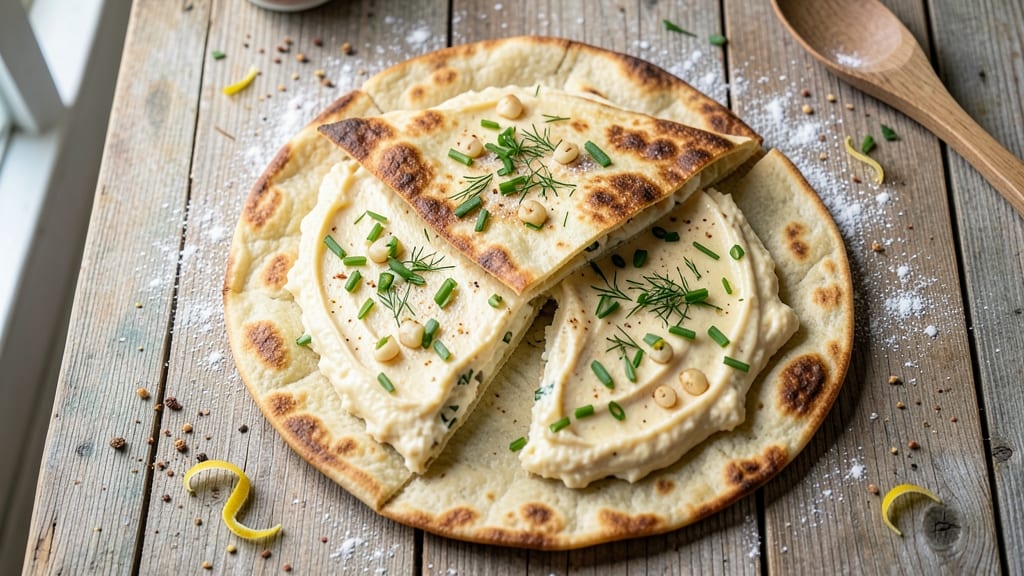
This baked cottage cheese wrap recipe delivers crispy edges and cheesy pull-apart layers that transform a simple appetizer into a crowd-pleasing showstopper. The secret lies in blending cottage cheese with herbs and vegetables, then baking until golden—creating a texture that’s both satisfying and elegant.
I developed this recipe after craving a vegetarian option that felt indulgent yet balanced, and it never fails to impress.
What sets these wraps apart is their foolproof technique: a mix of cottage cheese, flour, and baking powder creates a light, airy filling that crisps beautifully in the oven. The addition of fresh herbs and vegetables adds brightness, while the pull-apart texture makes every bite irresistible.
Perfect for parties or a light lunch, these wraps bake in just 20 minutes and require minimal prep.
The result is a dish that’s crispy on the outside, creamy and cheesy inside, with layers that practically melt in your mouth. The golden-brown crust contrasts beautifully with the soft, herby filling, making them as visually appealing as they are delicious.
Serve with a side of marinara or a fresh salad for a complete meal.
This recipe is also highly adaptable—swap in your favorite vegetables or herbs to customize it to your taste. Whether you're hosting a gathering or simply craving something comforting, these wraps are sure to become a regular in your rotation. Let’s get started!
Ingredients for baked cottage cheese wrap
Four tortillas, creamy cottage cheese, and herbs transform into golden, crispy wraps everyone will love.
| Ingredient | Amount | Notes |
|---|---|---|
| Large Flour Tortillas 🌯 | 4 whole | 8-inch size for even baking |
| Small-Curd Cottage Cheese 🧀 | 16 oz | Full-fat for creaminess |
| All-Purpose Flour 🌾 | 1 cup | For crispy texture |
| Baking Powder 🍞 | 1 tsp | Ensures lightness |
| Garlic Cloves 🧄 | 2 cloves | Minced for flavor |
| Fresh Chives 🌿 | ¼ cup | Finely chopped |
| Fresh Dill 🌿 | ¼ cup | Chopped, stems removed |
| Red Bell Pepper 🌶️ | ½ cup | Diced, fresh or frozen |
| Extra-Virgin Olive Oil 🫒 | 2 tbsp | For brushing tortillas |
| Salt 🧂 | ½ tsp | Diamond Crystal preferred |
| Black Pepper 🌶️ | ¼ tsp | Freshly ground |
| Eggs 🥚 | 1 whole | For binding |
| Shredded Mozzarella Cheese 🧀 | 1 cup | Part-skim for balance |
The cottage cheese is the star here—full-fat, small-curd varieties like Tillamook or Organic Valley work best. Whole Foods and Trader Joe's carry excellent options, but any brand with visible curds will do. Fresh herbs make all the difference: chives and dill add brightness, but parsley or basil work too if that's what you have. The baking powder is crucial—it's what gives those wraps that light, airy texture inside. Skip it, and you'll get dense, heavy bites instead. For the tortillas, Mission or La Tortilla Factory brands hold up best during baking—they won't tear or shrink.
No fresh herbs? Dried chives or dill at one-third the amount will work in a pinch, though they won't have the same pop. Swap the red bell pepper for zucchini, spinach, or roasted eggplant—whatever you've got on hand. The mozzarella adds that cheesy pull-apart factor, but provolone or fontina melt even better. Short on cottage cheese? Greek yogurt works in a bind, though it'll be slightly tangier. For extra crispiness, brush the tortillas with a little olive oil mixed with water before baking—it creates that perfect golden crust without making them greasy.
Prep ahead to save time: mix the cottage cheese filling and store it in the fridge for up to 2 days. Tortillas keep best in a cool, dry place for 1 week, but once you open the package, freeze them to preserve freshness. These wraps reheat beautifully—350°F for 5-7 minutes restores that crispy edge. I like to assemble them the night before and bake straight from the fridge for even browning. Leftovers? They freeze wonderfully for 3 months—just thaw and reheat. Perfect for meal prep!
Why You'll Love This Recipe
- No-Fuss Baking: Mixing the dough takes less than five minutes—I just toss flour, baking powder, and a splash of water until it holds together. No rolling pins or fancy techniques, just press it into the tortilla, fold, and bake. Honestly, it’s the kind of recipe that makes me laugh because it’s so simple.
- Garlicky Magic: That roasted garlic clove tucked into the center? It infuses the whole wrap with a rich, warm depth you won’t find in store-bought versions. The small-curd cottage cheese adds a tangy creaminess that balances the crispy edges perfectly—like a cheesy, garlicky hug in every bite.
- Lunchbox Hero: These wraps freeze like a dream, so I bake a batch on Sundays and stash them for school lunches or busy weeknights. No soggy sandwiches here—they reheat in seconds and stay sturdy enough to eat cold if needed. My kids actually finish them, which is basically a miracle.
- Pantry Staple Power: You’re already using things you have—flour, cottage cheese, garlic—so no extra shopping. The dough’s forgiving, and the cottage cheese stretch means you can make them big or small without waste. Between us, this is the kind of recipe that makes me feel like I’m feeding my family something special without breaking the bank.
Step-by-step instructions for baked cottage cheese wraps
Here's how to create golden, crispy wraps with gooey cheese layers—simple but packed with flavor.
Prepare the Cottage Cheese Filling
In a mixing bowl, combine the 16 oz small-curd cottage cheese, 1 cup shredded mozzarella cheese, 2 cloves minced garlic cloves, 0.25 cup finely chopped fresh chives, and 0.25 cup chopped fresh dill. Mix until fully integrated—you want a smooth, creamy texture without any lumps. The cottage cheese should look like a thick, herby spread.
Next, stir in the 1 whole egg, 0.5 tsp salt, and 0.25 tsp black pepper. This egg acts as a binder, helping the filling hold together while adding richness. Taste the mixture and adjust seasoning if needed—this is your flavor foundation. Real talk: the cottage cheese will look oddly thick, but that's perfect for creating those pull-apart layers later.
Create the Wrap Layers
Place one of the 4 large flour tortillas on a clean surface and spread about ¼ of the cottage cheese mixture evenly, leaving a ½-inch border around the edges. You'll want a thin, even layer—this prevents soggy wraps. Press down gently with a spatula to help the filling adhere.
Sprinkle ¼ cup diced red bell pepper evenly over the cottage cheese layer. The bell pepper adds a subtle sweetness that balances the tangy cottage cheese. Fold the tortilla in half like a burrito, then fold it in thirds to create a compact rectangle. Repeat with the remaining tortillas and filling.
Assemble the Wrap Stack
In a greased 9x13-inch baking dish, arrange the folded wraps in a single layer, seam-side down. Brush each tortilla with ½ tablespoon extra-virgin olive oil—this creates a crispy exterior. Sprinkle the remaining 1 cup all-purpose flour and 1 tsp baking powder evenly over the top. The flour helps create that signature crispy texture, while the baking powder ensures lightness.
Here's the thing—don't press down on the wraps. We want them to expand slightly in the oven, creating those cheesy, pull-apart layers. If the filling looks too thick, gently press the top with your fingers to help it spread evenly.
Bake to Golden Perfection
Preheat your oven to 375°F and bake the wraps for 25-30 minutes until the edges are deep golden brown and the filling is set. You'll know it's done when the top looks crispy and the cheese inside is just starting to bubble slightly. The wraps should hold their shape but still feel tender when pressed.
If the top isn't browning enough, tent with foil for the last 5 minutes to prevent over-browning while finishing the interior. The key is patience—rushing will leave you with chewy, undercooked centers. Let them rest for 5 minutes before serving to allow the filling to set completely.
Serve Warm and Enjoy
Carefully transfer the wraps to a cutting board and slice into 1-inch thick pieces. The layers should be crispy on the outside with a gooey, herby cottage cheese center. Serve immediately while still warm—these wraps are best enjoyed fresh out of the oven.
For extra flair, drizzle with a little more extra-virgin olive oil and sprinkle with additional fresh dill. The contrast of crispy tortilla and creamy cheese makes every bite satisfying. Store leftovers in an airtight container for up to 3 days, though they're rarely that lucky!
Pro Tips For Making Baked Cottage Cheese Wrap
- PREHEAT TO 375°F: I learned this the hard way—skipping the preheat or using a lower temp means your wraps will steam instead of crisp. That 375°F mark is the sweet spot for a golden crust without burning the edges, especially when you’re layering cottage cheese and flour tortillas.
- USE SMALL-CURD COTTAGE CHEESE: Large curds turn into a gummy mess when baked, and nobody wants that. Small-curd cottage cheese blends smoothly into the tortilla mix, giving you that perfect creamy texture without clumping—just drain it well first to avoid soggy wraps.
- PRESS WRAPS FLAT BEFORE BAKING: I used to slap these together and shove them in the oven, only to watch them puff up like sad balloons. Press each wrap firmly with your palm (or a rolling pin) to even out the thickness—this guarantees even baking and a crispy shell every time.
- SALT THE FLOUR MIX: This isn’t just about flavor—it’s about texture. Sprinkle ½ teaspoon of salt into the flour mix before combining it with cottage cheese. The salt tightens the gluten just enough to prevent the tortillas from becoming rubbery when baked. (Yes, even if your cottage cheese is already salted.)
Wine and beer pairings for these flavors
Crisp White Wine
An Italian Pinot Grigio or Sauvignon Blanc cuts through the richness of the cottage cheese while complementing the fresh herbs. Look for a crisp, dry wine with citrus notes—La Crema Sauvignon Blanc or Santa Margherita Pinot Grigio are perfect choices.
The acidity refreshes your palate between bites of creamy, crispy wrap. 🍷
Light Beer Pairings
A wheat beer like Blue Moon Belgian White or Hoegaarden enhances the herby flavors without overpowering. The slight tang and effervescence cleanse your palate, making each bite of the cottage cheese filling taste fresh.
For a local favorite, try a German Helles Lager—its mild maltiness balances the wrap’s richness beautifully.
Red Wine for Bold Lovers
If you prefer red, opt for a light-bodied Chianti or Pinot Noir. The Chianti Classico from Tuscany pairs wonderfully with the wrap’s garlic and herbs, while a New Zealand Pinot Noir adds a fruity contrast. Avoid heavy reds like Cabernet—they’ll clash with the delicate flavors. 🍇
Non-Alcoholic Options
For a refreshing non-alcoholic match, try sparkling water with a splash of lime or a ginger-mint iced tea. The effervescence mimics wine’s cleansing effect, while the citrus brightens the dish. A cucumber-lime spritzer with soda water also works—it’s light, crisp, and perfectly balanced. 💧
Dessert Wine Finish
Save a Moscato d’Asti or Riesling for dessert to complement the cheesy richness. The sweetness of these wines mirrors the cottage cheese’s creaminess, creating a satisfying finish. Serve chilled for the best experience—it’s a crowd-pleaser after a savory meal. 🍷✨
Nutrition facts
Frequently asked questions
Can I make these wraps ahead of time?
Assemble the wraps up to 24 hours ahead and refrigerate them uncovered. When ready to bake, let them sit at room temperature for 30 minutes before baking at 375°F for 25-30 minutes. The cold start helps create extra crispy edges. For freezing, assemble and bake as directed, then cool completely before wrapping tightly in plastic and foil. Freeze for up to 3 months—thaw overnight in the fridge before reheating at 350°F for 10 minutes.
What if my tortillas tear when folding? This usually happens when the filling is too thick or uneven. First,
Can I make these wraps without eggs?
Yes! Replace the 1 egg with 2 tablespoons of milk or water plus 1 tablespoon of cornstarch. This helps bind the filling while keeping it creamy. For extra security, add ½ teaspoon of mustard powder—it mimics the egg's binding properties. The texture will be slightly less firm, but still delicious. If you're vegan, use flax eggs (1 tablespoon ground flaxseed + 3 tablespoons water) and reduce the milk by 1 tablespoon.
Why did my wraps turn out dense instead of crispy?
Dense wraps usually happen from one of three issues: too much filling, skipping the flour/baking powder, or underbaking. Double-check your measurements—the cottage cheese mixture should be thin enough to spread easily. The 1 cup flour + 1 teaspoon baking powder sprinkled on top is crucial for crispiness. Also, ensure you bake at 375°F for the full 25-30 minutes—don't rush it! If the top isn't browning, tent with foil for the last 5 minutes to finish cooking while preventing over-browning.
What are the best sides to serve with these?
These wraps shine with light, fresh sides that balance their richness. Try a crisp cucumber-tomato salad with lemon vinaigrette, roasted cherry tomatoes with basil, or warm pita bread for scooping up any leftover filling. For a heartier meal, pair with garlic sautéed spinach or a simple Greek salad. A drizzle of smoky chipotle mayo on the side adds a tangy kick that cuts through the cheese beautifully.