
Soups & Stews
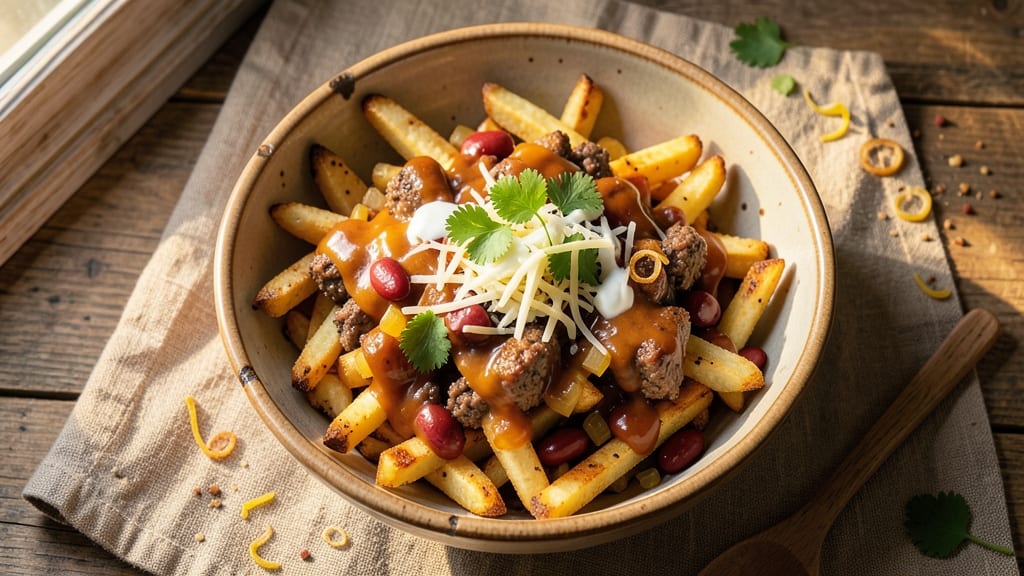
This baked chili cheese fries recipe delivers restaurant-quality comfort food with crispy golden fries, gooey cheese rivers, and hearty chili—all baked until perfectly crispy. The triple-layered approach ensures every bite has that satisfying crunch, melty cheese pull, and rich chili flavor that makes this dish a crowd-pleaser.
I’ve perfected this technique over years of testing, so you can trust the results will be foolproof every time.
The secret to these fries lies in the layering: crispy fries form the base, followed by a thick blanket of chili, and finally a generous topping of melted cheese. Baking at the right temperature ensures the cheese gets bubbly and golden while keeping the fries perfectly crispy—not soggy.
This method also allows you to customize the chili and cheese to your taste, whether you prefer classic beef chili or a lighter vegetarian version.
What you’ll end up with is a dish that’s hearty enough for a main course but easy enough for a weeknight dinner. The cheese pulls into rivers as you cut in, and the fries stay crispy even after baking.
It’s the kind of meal that disappears quickly, leaving everyone asking for seconds. Plus, it’s a great way to use up leftover chili or fries, making it both practical and delicious.
Serve with sour cream, green onions, or jalapeños for extra flavor, and don’t forget the hot sauce for those who like it spicy. This recipe is designed to be flexible, so you can adjust the ingredients to fit your preferences. Let’s get started on creating this ultimate comfort food dish!
Ingredients for baked chili cheese fries
Pantry staples plus a few key ingredients for that perfect triple-layered crunch and melt.
| Ingredient | Amount | Notes |
|---|---|---|
| Russet Potatoes 🥔 | 2 lb | Cut into 1-inch sticks, soaked in cold water |
| Yellow Onion 🧅 | 1 whole | Diced, medium size preferred |
| Ground Beef 🥩 | 1 ½ lb | 80/20 fat ratio for juiciness |
| Canned Tomato Sauce 🍅 | 15 oz | San Marzano preferred for sweetness |
| Chili Beans 🫘 | 1 can (15 oz) | Drained, or use kidney beans |
| Cheddar Cheese 🧀 | 2 cups | Shredded, sharp variety preferred |
| Mozzarella Cheese 🧀 | 1 cup | Shredded, low-moisture preferred |
| Olive Oil 🫒 | 2 tbsp | For tossing and baking |
| Garlic Cloves 🧄 | 4 cloves | Minced, fresh preferred |
| Chili Powder 🌶️ | 1 tbsp | Smoked variety adds depth |
| Ground Cumin 🌿 | 1 tsp | Toasted for deeper flavor |
| Salt 🧂 | 1 ½ tsp | Kosher or sea salt preferred |
| Black Pepper 🌶️ | ½ tsp | Freshly ground preferred |
| Sour Cream 🥛 | ½ cup | For serving, optional |
| Green Onions 🧅 | 4 whole | Chopped, for garnish |
The potatoes are the foundation—Russet is ideal for crispiness, but Yukon Gold works too. Soak them in cold water for 20 minutes before baking to remove excess starch (trust me, it makes a difference). For the beef, 80/20 fat ratio is non-negotiable—it keeps the chili juicy. I grab mine from Costco or the butcher counter at Whole Foods when I can. The canned tomato sauce? San Marzano is worth the splurge—sweeter and smoother than regular brands, and it makes the chili sing. If you can't find it, any quality crushed tomato works, but avoid the watery kinds.
No chili beans? Kidney beans or pinto beans are perfect swaps—just drain and rinse them well. Short on cheddar? Monterey Jack or pepper jack add different flavors, but cheddar's the classic. The mozzarella should be low-moisture shredded—the pre-shredded kind from the store is fine, but if you're ambitious, block mozzarella shreds better. For the spices, Penzeys or the bulk section at Trader Joe's have the best quality. Toast the cumin seeds in a dry pan for 30 seconds before grinding if you want to take it to the next level (worth it!).
Potatoes keep best in a cool, dark place for 2-3 weeks, but once cut, store them in water in the fridge. The chili components (beef, beans, sauce) can be prepped ahead and refrigerated for 3-4 days—this is a great make-ahead dish. The assembled fries reheat beautifully: 5 minutes at 400°F until the cheese is bubbly again. I always make a double batch—leftovers reheat just as well as the first go-round, and they're perfect for lunch the next day.
Why You'll Love This Recipe
- One-Pan Magic: I swear by this recipe when I’m too tired to wash dishes. Russets get tossed in whole, baked until crispy, then smothered in the chili-beef mix—no chopping, no fuss.
- Deep, Familiar Comfort: That first bite of cheesy, saucy fries with the meaty chili beans? It’s like a hug from my college cafeteria days. The onion softens just enough to melt into the tomato sauce, while the beef stays rich and tender.
- Game for Any Gathering: Honestly, this feeds my book club or my kid’s soccer team friends without breaking the bank. Double the batch, bake extra potatoes, and you’ve got leftovers for lunch—or a midnight snack.
- Budget-Friendly Flex: Between us, this recipe uses pantry staples that won’t empty your wallet. Ground beef stretches with beans, canned sauce saves time, and Russets are cheaper than fancy potatoes. Plus, it’s the kind of meal that tastes even better the next day.
Step-by-step instructions for triple-layered chili cheese fries
Here's how to build fries with crispy edges, gooey cheese rivers, and hearty chili filling.
Prepare the Potatoes for Maximum Crunch
Drain the soaked 2 lb Russet Potatoes thoroughly and pat them completely dry with paper towels. This step is crucial—any moisture left on the potatoes will steam them in the oven instead of crisping them up. Cut the potatoes into 1-inch sticks, ensuring they're all roughly the same size so they cook evenly.
Spread the potato sticks on a baking sheet in a single layer and toss them with 1 tablespoon of the 2 tbsp Olive Oil. This light coating helps create that perfect crispy exterior. Arrange them in one direction on the sheet—this makes it easier to flip them later and ensures even browning. Preheat your oven to 425°F while you prepare the chili mixture.
Cook the Chili Filling with Ground Beef and Aromatics
Heat 1 tablespoon of the remaining Olive Oil in a large skillet over medium-high heat. Add the 1.5 lb Ground Beef and cook until browned, breaking it into small pieces as it cooks. This should take about 5-6 minutes. Drain any excess fat, leaving about 1 tablespoon in the pan for flavor.
Add the diced 1 whole Yellow Onion and the 4 minced Garlic Cloves to the skillet, cooking for 3-4 minutes until softened and fragrant. Stir in the 1 tbsp Chili Powder, 1 tsp Ground Cumin, 1.5 tsp Salt, and 0.5 tsp Black Pepper, cooking for another 30 seconds to toast the spices. Pour in the 15 oz Canned Tomato Sauce and the drained 1 can (15 oz) Chili Beans, then simmer for 10 minutes until the flavors meld together.
Bake the Potatoes Until Golden and Crispy
Place the prepared potato sticks on a parchment-lined baking sheet, spacing them evenly. Bake at 425°F for 20 minutes, flipping halfway through. You'll know they're ready when they're golden brown and crispy on both sides. Remove them from the oven and reduce the oven temperature to 375°F.
While the potatoes bake, shred the 2 cups Cheddar Cheese and 1 cup Mozzarella Cheese together. The combination of sharp cheddar and creamy mozzarella creates those perfect cheese rivers when melted. Keep the cheeses separate if you prefer distinct layers, but mixing them gives a more cohesive texture.
Assemble the Triple-Layered Fries
Return the crispy potato sticks to the baking sheet and spread the chili mixture evenly over them, making sure each fry gets a generous coating. The chili should be warm but not hot—this helps it cling to the potatoes instead of sliding off. Sprinkle half of the cheese mixture over the chili, spreading it evenly.
Return the fries to the oven at 375°F for 5-7 minutes, until the cheese begins to bubble and turn golden brown. This is where the magic happens—the cheese melts into those beautiful rivers while the potatoes stay crispy underneath. Watch closely to prevent over-browning, which can happen quickly at this temperature.
Finish with Garnishes and Serve Immediately
Remove the fries from the oven and top with the remaining cheese mixture, spreading it evenly. Return to the oven for just 1-2 minutes to melt the final layer of cheese. This last step ensures every bite has that perfect combination of textures and flavors.
Garnish each serving with the chopped 4 whole Green Onions and a dollop of the 0.5 cup Sour Cream. Serve immediately while the fries are still crispy and the cheese is molten. The contrast of crunchy potatoes, hearty chili, and gooey cheese makes this dish irresistible. Enjoy with a cold drink and extra napkins—these fries are messy in the best way!
Pro Tips For Making Baked Chili Cheese Fries
- PREHEAT YOUR PAN—REALLY: The oven should hit 425°F before the potatoes go in, not just close. I learned this the hard way—lukewarm ovens mean soggy fries that turn to mush under the chili. If your oven runs hot, bake them 2-3 minutes less than the recipe says.
- CUT POTATOES UNIFORM: No, "roughly chopped" doesn’t cut it. Aim for ¼-inch thick sticks—thinner edges crisp faster, but thicker centers stay tender. Use a mandoline if you’re impatient (yes, even if you’re me), or at least slice them all the same size. Uneven fries mean some burn, others stay raw.
- DRAIN BEANS WELL: Skip the "just rinse" step—drain those chili beans in a colander for 2 full minutes. The leftover canned liquid adds water, turning your chili into a thin, sad sauce. If you’re using pre-cooked beans, pat them dry with a towel afterward. Trust me, the texture changes everything.
- SALT THE POTATOES TWICE: Toss them with salt before baking, then again right after tossing with oil. The first salt seasons the starch, the second locks it in. I used to skip this, and the fries always tasted bland compared to takeout. (Pro move: Use ½ tsp coarse salt per pound of potatoes.)
Regional styles of this dish
Texas-Style Smoky Heat
This regional take leans into bold flavors with extra smoked paprika and chipotle powder—about 1 tbsp of each—blended into the chili base. Texans often add 1 diced jalapeño to the chili mixture for a subtle kick, and top with diced avocado and pickled red onions for freshness.
I like to serve this version with a side of cool ranch dressing for dipping. 🌶️
New England Creamy Twist
Up north, they take a different approach by adding ½ cup sour cream to the chili mixture before baking, giving it a velvety texture. The cheese topping often includes white cheddar mixed with Gruyère for a nutty depth, and they finish with crispy fried shallots for crunch.
A drizzle of maple syrup on the cheese adds a surprising sweetness that balances the spice. Perfect for chilly evenings!
Southwest Spicy Kick
In the Southwest, the chili gets a boost with diced roasted corn and black beans instead of kidney beans, plus ½ cup diced green chiles (like Anaheim or poblano).
The cheese topping often includes queso fresco crumbles mixed with the cheddar for a tangy finish. Garnish with cilantro and lime wedges for that zesty Southwest flair. 🌵
Midwest Hearty Classic
This version keeps it simple with a thicker chili—add 2 tbsp cornstarch to the chili mixture to absorb excess liquid. The cheese topping is all sharp cheddar, and they often add crumbled bacon bits for extra richness.
Serve with a side of blue cheese dressing for dipping, and don’t forget the extra napkins—this one’s a crowd-pleaser! 🍖
Pacific Northwest Lighter Take
West Coast cooks often swap ground beef for lean ground turkey or portobello mushrooms to keep it lighter, and they use feta cheese mixed with the cheddar for a briny contrast.
Garnish with thinly sliced radishes and microgreens for a fresh, vibrant touch. A drizzle of chili oil adds a smoky finish without overpowering the dish. 🌿
Southern BBQ Fusion
Down South, they blend chili with BBQ sauce—about ¼ cup mixed into the chili—and top with pulled pork instead of just cheese. The fries get a dusting of smoked paprika before baking, and they finish with pickled jalapeños and coleslaw on the side.
It’s like a loaded baked potato meets chili cheese fries! 🍖
Nutrition facts
Frequently asked questions
Can I make these fries ahead of time?
Prep the chili and cheese toppings up to 3 days in advance and store them separately in the fridge. For the potatoes, bake them 1 day ahead and reheat at 425°F for 10 minutes before assembling. The key is to keep the cheese and chili cold until baking to prevent sogginess. Assemble and bake fresh for the best texture.
What's the best way to keep the fries crispy?
Pat the potatoes completely dry before baking and arrange them in a single layer on the baking sheet. Avoid overcrowding, which traps steam. Use parchment paper for easy transfer, and bake at 425°F until golden. The high heat creates that perfect crispy texture—don't skip it!
Can I use frozen fries instead of fresh?
Yes, but with adjustments! Use 1 bag (32 oz) of frozen fries and bake them 5 minutes longer at 425°F until fully crispy. The frozen fries already have seasoning, so reduce the salt in the chili to 1 tsp. They work well, but fresh potatoes give the best texture and flavor.
How do I make this vegetarian?
Swap the ground beef for 1 lb of crumbled tempeh or 15 oz of lentils (cooked). Use 1 can (15 oz) black beans instead of kidney beans and add 1 tbsp soy sauce for depth. The chili will be heartier—just adjust the seasoning to taste. Top with vegan cheese or nutritional yeast for that melty texture.
Why did my cheese get rubbery?
Rubbery cheese usually means it was overcooked or the oven temperature was too high. Keep the oven at 375°F and watch closely—cheese should bubble and turn golden in 5-7 minutes. Use low-moisture shredded cheese (pre-shredded works best) and avoid pre-melting it before baking.