
Breakfast & Brunch
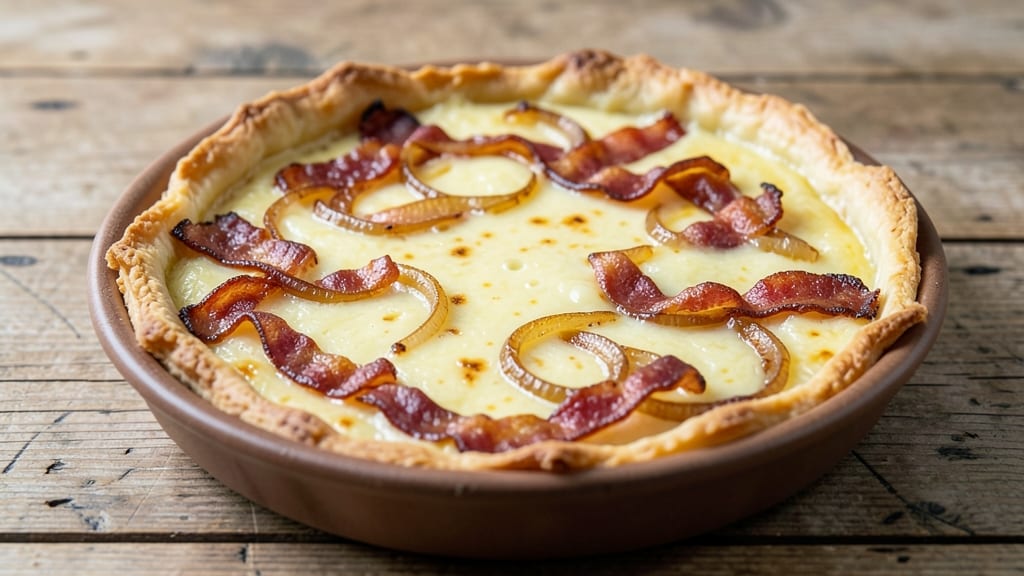
This bacon cheese and onion quiche delivers the perfect balance of crispy crust, savory bacon, caramelized onions, and creamy egg filling—all in one golden, flaky masterpiece. 🌟 The secret lies in a buttery, layered crust that stays tender while holding up to the rich filling, and a filling technique that ensures onions soften without turning mushy while bacon renders to crispy perfection.
What sets this recipe apart is the layered approach: first, you'll create a classic pie crust that bakes up with a delicate crisscross pattern, then build the filling in stages to maximize flavor development.
The onions caramelize slowly in the oven while the eggs set into a silky custard, creating a texture that's both rich and light. Every bite delivers crispy bacon, sweet onions, and sharp cheddar in perfect harmony.
The result is a quiche that's hearty enough for brunch but elegant enough for dinner—ideal for weekend gatherings or a special weekend breakfast. The crust remains crisp at the edges while staying tender in the center, and the filling sets just enough to slice cleanly.
This recipe transforms simple pantry ingredients into something restaurant-worthy with minimal effort.
Whether you're serving it warm with a side salad or letting it cool slightly for clean slices, this quiche delivers satisfaction in every forkful. The combination of textures—crisp crust, creamy filling, and crispy bacon—makes it a crowd-pleaser that disappears faster than you can say "second helping."
Ready to master this classic with a modern twist?
Ingredients for bacon cheese and onion quiche
Six ingredients for a flaky crust, plus savory fillings that create golden layers of perfection.
| Ingredient | Amount | Notes |
|---|---|---|
| All-Purpose Flour 🌾 | 2 ½ cups | Sifted for flaky crust texture |
| Unsalted Butter 🧈 | 1 cup | Cold, cubed for pastry cutting |
| Ice Water 💧 | ½ cup | For dough hydration control |
| Large Eggs 🥚 | 3 whole | Room temperature for even baking |
| Heavy Cream 🥛 | ½ cup | Full-fat for rich filling |
| Sharp Cheddar Cheese 🧀 | 1 ½ cups | Shredded, aged for sharpness |
| Thick-Sliced Bacon 🥓 | 10 oz | Cooked crisp, chopped small |
| Yellow Onions 🧅 | 1 ½ cups | Thinly sliced, caramelized |
| Garlic Cloves 🧄 | 2 cloves | Minced for aromatic base |
| Salt 🧂 | 1 ½ tsp | Kosher or sea salt |
| Black Pepper 🌶️ | ½ tsp | Freshly ground for flavor |
| Dried Thyme 🌿 | ½ tsp | Or 1 tsp fresh thyme leaves |
| Olive Oil 🫒 | 1 tbsp | For crust brushing |
The crust starts with cold butter—never skip chilling the dough. King Arthur flour or Gold Medal all-purpose work best for that signature flakiness. For the bacon, thick-cut slices from Oscar Mayer or Applegate render perfectly without burning. Onions should be sweet yellow—Vidalias or Maui onions caramelize beautifully. Pre-shredded cheese? Never—it's full of anti-caking agents that make the filling grainy. Grate your own from a block of sharp cheddar like Cabot or Tillamook.
No heavy cream? Full-fat sour cream plus a splash of milk mimics the texture. Swap cheddar for Gruyère or Swiss if you prefer milder flavors. The bacon can be pre-cooked from a package, but homemade crispy bacon makes all the difference—just bake at 400°F for 15 minutes until perfectly done. Onion substitutes? Leeks or shallots add depth, but onions bring that sweet caramelization. Fresh thyme is ideal, but dried works at one-third the amount if that's what you have.
Assemble the crust and filling up to 24 hours ahead—it keeps beautifully in the fridge. For make-ahead convenience, pre-bake the crust and store it wrapped in parchment for up to 2 days. The finished quiche reheats best at 350°F for 10-12 minutes—just until the center is warm through. Leftovers? Portion into slices and freeze for up to 3 months. Microwave reheats work, but oven-warmed slices taste like fresh-baked.
Why You'll Love This Recipe
- No-Fuss Crust: I swear by this cold butter-and-flour crust trick—just mix, chill, roll. No rolling pin? No problem. The ice water keeps it from sticking, and it’s ready in 10 minutes while you cook the filling. Honestly, it’s the only crust I make anymore.
- Salty Sweet Magic: That crispy bacon crumbles into the creamy egg filling like it’s been waiting its whole life for the sharp cheddar and caramelized onions. The heavy cream makes it rich but not heavy, and the eggs? They’re the star—silky, custardy perfection every time.
- Weeknight Hero: I’ve served this for lazy Sundays, potlucks where I showed up late, and even as a quick lunch when my kid’s soccer practice ran over. It reheats beautifully, and the leftovers? Still taste like you slaved over them.
- Budget Breakfast: Eggs and flour are cheap, and bacon stretches further than you’d think. I’ll be real: this feeds four for under $10, and the flavor is so satisfying, no one complains about the price. Plus, it’s the kind of dish that makes grocery money stretch without sacrificing taste.
Step-by-step instructions for bacon, cheese, and onion quiche
Here's how to build a quiche with a perfectly flaky crust and rich, savory filling.
👨🍳 Step 1: Make the Flaky Crust
Cut the 1 cup unsalted butter into ½-inch cubes and place in the freezer for 10 minutes to firm up. In a large bowl, whisk together the 2.5 cups all-purpose flour and 1.5 teaspoons salt. Add the cold butter cubes and use a pastry cutter or your fingers to work the butter into the flour until the mixture resembles coarse crumbs with some pea-sized butter pieces remaining.
Drizzle in the ½ cup ice water, 1 tablespoon at a time, gently tossing with a fork until the dough just comes together. Avoid overmixing—just combine until the dough holds when pressed. Turn the dough onto a lightly floured surface, shape into a disk, wrap in plastic, and refrigerate for at least 1 hour (or up to 24 hours). This resting time is crucial for a flaky crust.
🍳 Step 2: Prepare the Filling
Cook the 10 oz thick-sliced bacon in a skillet over medium heat until crisp. Drain on paper towels, then chop into ¼-inch pieces. Set aside. In the same skillet, add 1 tablespoon olive oil and sauté the 1.5 cups yellow onions for 8-10 minutes until softened and golden. Add the 2 cloves minced garlic and cook for 30 seconds until fragrant.
In a separate bowl, whisk together the 3 large eggs, ½ cup heavy cream, 1.5 cups shredded sharp cheddar cheese, ½ teaspoon black pepper, and ½ teaspoon dried thyme. Stir in the cooked bacon and onion mixture. Let the filling rest for 10 minutes to allow flavors to meld.
🥘 Step 3: Assemble and Bake
Preheat your oven to 375°F. On a floured surface, roll out the chilled dough to ⅛-inch thickness and transfer it to a 9-inch pie dish, pressing gently to fit. Trim excess dough, leaving a ½-inch overhang. Crimp the edges with a fork or your fingers. Prick the bottom with a fork and line with parchment paper, filling with pie weights or dried beans. Bake for 15 minutes to pre-bake the crust.
Remove the weights and parchment, then brush the crust with a little beaten egg white for extra browning. Pour the filling into the crust, spreading evenly. Bake for 35-40 minutes until the center is set and the top is golden brown. A knife inserted should come out clean. Let cool for 10 minutes before slicing—this prevents filling from spilling out.
🔥 Step 4: Finish and Serve
Transfer the quiche to a wire rack and let it cool for 15 minutes before slicing into 6 equal wedges. The crust should be golden and crisp, while the filling remains creamy with perfectly melted cheese. Serve warm or at room temperature for the best texture.
For extra flakiness, brush the crust with melted butter before baking. If the top browns too quickly, tent with foil. Enjoy within 2 days for the best flavor and texture.
Pro Tips For Making Bacon Cheese And Onion Quiche
- Chill the Dough First: Roll out that butter-flour crust straight from the fridge—it’s the only way to avoid a greasy, soggy bottom. I used to skip this, and my quiches always felt like they needed a napkin underneath.
- Caramelize the Onions: Cook the onions until they’re deep golden, not just soft—about 20 minutes with a splash of water to keep them from burning. Sweet, jammy onions make the whole dish sing, and skipping this step means missing out on that rich depth.
- Don’t Overmix the Filling: Whisk the eggs and cream just until combined—lumps are fine. Overmixing makes the quiche dense and rubbery, and nobody wants a sad, heavy slice. A quick fold is all it takes.
- Bake Until the Center Jiggles: Pull the quiche when it’s set but the middle still wobbles slightly—it’ll finish cooking while you’re eating it. I learned this after cutting into one that was still jiggly inside and wondering why it tasted underdone.
Flavor customization for this recipe
Spicy Heat Boost
Add ½ teaspoon smoked paprika and ¼ teaspoon cayenne pepper to the filling for a subtle kick. For more heat, fold in 1-2 tablespoons of chipotle peppers in adobo sauce with the onions. I love this with a sprinkle of hot honey before serving—it balances the smokiness beautifully. 🌶️
Herb Variations
Swap out thyme for 1 teaspoon fresh rosemary or 1 tablespoon chopped chives for a brighter flavor. I also enjoy adding ½ teaspoon dried oregano to the filling—it pairs wonderfully with the bacon and cheese. Fresh herbs should be added just before baking to preserve their aroma.
Cheese Swaps
Replace cheddar with Gruyère for a nutty depth or Gouda for a slightly sweet, caramel-like flavor. For a sharper bite, mix in ½ cup crumbled blue cheese—it creates amazing contrast with the creamy filling. Pre-shredded cheese? Never—always grate fresh for the best texture.
Sweet Onion Twist
Use sweet onions like Maui or Vidalia for natural caramelization without added sugar. For extra depth, add 1 teaspoon brown sugar while sautéing the onions. I also love adding 1 tablespoon apple cider vinegar at the end to brighten the flavor profile.
Crispy Topping
Sprinkle crushed potato chips or panko breadcrumbs on top before baking for added crunch. For extra richness, top with crumbled bacon bits or crispy fried shallots. These toppings add texture contrast that elevates every bite.
Extra Protein
Add ½ cup cooked diced ham or ½ cup crumbled sausage to the filling for extra heartiness. I also enjoy mixing in ¼ cup cooked breakfast sausage—it adds a smoky depth that pairs perfectly with the onions and cheese.
Just be sure to drain excess fat to keep the filling smooth.
Nutrition facts
Frequently asked questions
Can I make this quiche without a homemade crust?
Use a high-quality store-bought pie crust or even a pre-made puff pastry for convenience. For best results, choose a crust that's at least 1/8-inch thick and pre-bake it for 12-15 minutes at 375°F before adding the filling. Puff pastry works beautifully—just brush it with egg wash before baking for extra golden color.
How do I prevent a soggy crust when baking?
The key is pre-baking the crust and using a few smart techniques. Always blind-bake the crust with pie weights or dried beans for 15 minutes before adding filling. Let the filling rest for 10 minutes before pouring it in to reduce moisture. For extra insurance, add a thin layer of shredded cheese on the crust before the filling—it creates a barrier that keeps things crispy.
Can I make this quiche ahead of time?
This quiche actually tastes even better the next day! Assemble the crust and filling up to 24 hours ahead and refrigerate uncovered. Bake straight from the fridge, adding 5-10 minutes to the baking time. For make-ahead convenience, pre-bake the crust and store it wrapped in parchment for up to 2 days. The flavors develop beautifully overnight.
What's the best way to reheat leftovers?
Oven reheating gives the best results. Slice the quiche and place on a baking sheet, then warm at 350°F for 10-12 minutes until heated through. For quick reheating, microwave slices for 30-45 seconds covered with a damp paper towel—just be prepared for slightly softer crust edges. Never reheat straight from the fridge without warming.
Can I use frozen bacon instead of fresh?
Yes, but with one important adjustment. Cook frozen bacon 2-3 minutes longer to ensure it's fully crispy. Drain well on paper towels and chop as usual. The extra cooking time helps render more fat, which actually enhances the flavor of the filling. Just be sure to drain excess grease to keep the filling smooth and not greasy.