
Breakfast & Brunch
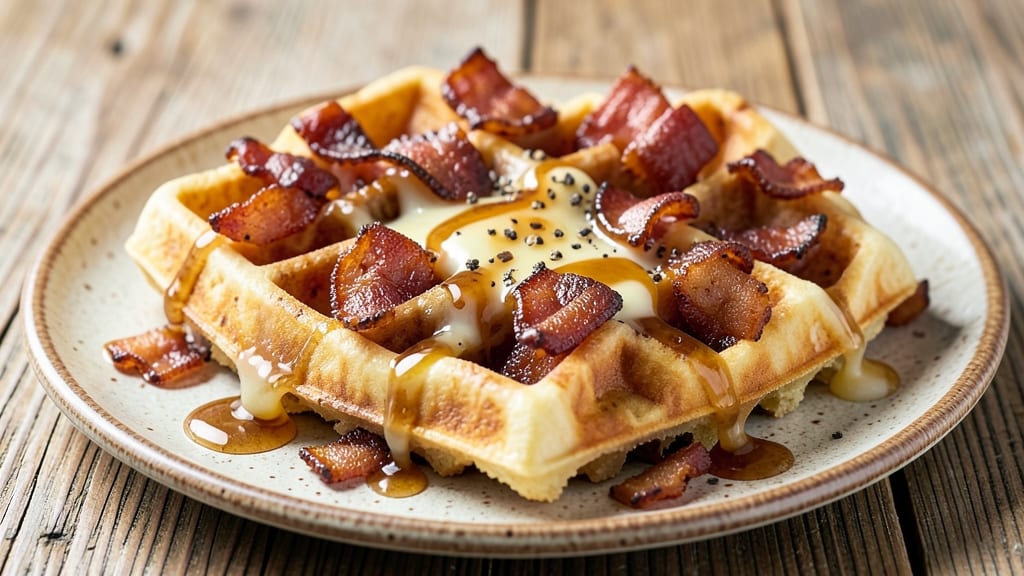
This bacon and cheese waffle recipe delivers the ultimate breakfast experience—crispy golden edges, perfectly melty cheese pockets, and smoky bacon in every bite. The secret lies in a foolproof batter that balances fluffiness with structure, while crispy bacon and sharp cheddar create the perfect savory-sweet harmony.
I’ve perfected this over years of weekend brunch testing, and it never fails to impress even the most skeptical eaters.
The magic happens in two stages: first, cooking thick-cut bacon until it’s crispy enough to crumble but still holds its shape. Then, folding that bacon into a rich waffle batter loaded with sharp cheddar and a touch of cream cheese for extra gooeyness.
The result? Waffles with crispy edges that stay crispy, even when piled high with maple syrup and extra bacon bits. This isn’t your average waffle—it’s a brunch game-changer.
What makes this recipe stand out is the balance of textures and flavors: the crispy bacon adds smoky depth, the cheddar melts into stretchy strands, and the waffle itself stays light yet sturdy enough to hold toppings without falling apart.
Whether you’re serving a crowd or treating yourself to a weekend indulgence, these waffles are worth every calorie. The best part? They’re ready in under 30 minutes, with minimal cleanup.
Pro tip: For extra crispy edges, preheat your waffle iron on high and spray it generously with oil before cooking. And if you’re feeling adventurous, swap the cheddar for gouda or pepper jack for a bold twist. Let’s get cooking—your taste buds will thank you.
Ingredients for bacon and cheese waffle
Crispy edges, melty cheese, smoky bacon—this waffle recipe delivers brunch perfection every time.
| Ingredient | Amount | Notes |
|---|---|---|
| All-Purpose Flour 🌾 | 2 cups | Sifted for light texture |
| Granulated Sugar 🍚 | ¼ cup | White or light brown |
| Baking Powder 🧂 | 2 tsp | Aluminum-free preferred |
| Salt 🧂 | ½ tsp | Kosher or sea salt |
| Large Eggs 🥚 | 2 whole | Room temperature |
| Milk 🥛 | 1 ½ cups | Whole for richness |
| Melted Butter 🧈 | ½ cup | Unsalted, cooled slightly |
| Vanilla Extract 🌸 | 1 tsp | Pure vanilla preferred |
| Thick-Cut Bacon 🥓 | 8 oz | Crispy, chopped small |
| Sharp Cheddar Cheese 🧀 | 1 ½ cups | Shredded, block preferred |
| Cream Cheese 🧈 | 4 oz | Room temperature, cubed |
| Vegetable Oil 🫒 | 2 tbsp | For waffle iron |
The bacon is non-negotiable here—thick-cut is key for that perfect crispy-but-not-burnt texture. Costco or Trader Joe's carry great options, or grab the thickest you can find at your local butcher. Cook it until it’s crispy enough to crumble but still holds its shape—this is what gives those waffles that addictive crunch. For the cheese, sharp cheddar from a block (like Cabot) melts into those perfect stretchy strands. Pre-shredded gets clumpy, so skip it if you can. And the cream cheese? Full-fat, room temperature—it adds that luxurious gooeyness that makes these waffles next-level.
No thick-cut bacon? Regular bacon works in a pinch, but it won’t hold up as well in the waffles. Swap cheddar for gouda or pepper jack if you’re feeling adventurous—they melt even better. Short on cream cheese? Add an extra 0.5 cup of cheddar for a similar effect. The milk can be any kind, but whole milk adds richness that really makes these waffles shine. And if you’re out of vanilla extract, a pinch of vanilla bean powder works in a bind. Just don’t skip it—vanilla rounds out all those bold flavors.
These waffles are best served fresh, but they’ll keep 2 days in the fridge wrapped tightly in foil. Reheat in a toaster or air fryer for 2-3 minutes to restore that crispy edge. For make-ahead magic, freeze cooked waffles between parchment paper—reheat straight from frozen for 3-4 minutes in the air fryer. Pro tip: Double the batch and freeze half. Weekend brunch just got easier.
Why You'll Love This Recipe
- Breakfast in Minutes: I swear, this takes longer to load the waffle iron than it does to mix the batter. Flour, sugar, eggs—just stir, pour, and let the magic happen. (Yes, even on a Tuesday night.)
- Crispy-Creamy Magic: That first bite? Crunchy edges with a pillowy center, all wrapped in smoky bacon and melty cheese. The baking powder does the work—no one’s measuring yeast or waiting for dough to rise.
- Brunch or Snack: Serve it with maple syrup for a lazy weekend brunch or pack a stack for lunch the next day. Kids? They’ll eat it straight from the iron. (My 8-year-old calls it "breakfast pizza.")
- Leftovers? Better: These reheat like a dream—just pop in the toaster until golden. Honestly, I’ve made a double batch on Sunday and still had them by Wednesday. Budget win, too—cheese and bacon stretch far.
Step-by-step instructions for bacon and cheese waffle recipe
Here's how to make waffles with crispy edges and melty cheese that'll have everyone begging for seconds.
Cook the Bacon Until Crispy
Place the 8 oz thick-cut bacon on a baking sheet lined with parchment paper. Bake at 400°F for 15-18 minutes, flipping halfway through, until deep golden brown and crispy. Watch closely after 12 minutes—it burns fast at this temperature. Let the bacon cool for 5 minutes, then chop into small pieces (about ¼-inch). Set aside—you'll need every bit of that smoky flavor.
I like to bake instead of pan-fry because it's hands-off and gives me more even cooking. If you prefer pan-fried, cook over medium heat for 10-12 minutes, flipping once, until crispy. Either way, don't skip the chopping—those tiny bacon bits distribute flavor perfectly throughout the waffles.
Make the Waffle Batter
In a large bowl, whisk together the 2 cups all-purpose flour, 0.25 cup granulated sugar, 2 tsp baking powder, and 0.5 tsp salt. This dry mix should look uniform with no flour clumps. In a separate bowl, beat the 2 whole large eggs until frothy, then whisk in the 1.5 cups milk, 0.5 cup melted butter (cooled slightly), 1 tsp vanilla extract, and the chopped bacon.
Here's the thing—don't overmix the wet ingredients. You just want to combine them smoothly. Then, gradually pour the wet mixture into the dry ingredients while stirring gently with a spatula. The batter should be thick but pourable—like heavy pancake batter. If it looks too thick, add 1 tablespoon milk at a time until it reaches that perfect consistency. Fold in the 1.5 cups sharp cheddar cheese and 4 oz cream cheese (cut into small cubes) until evenly distributed.
Prep the Waffle Iron
Heat your waffle iron according to manufacturer instructions—most take about 5 minutes to reach optimal temperature. While it's heating, lightly brush the plates with 1 tablespoon vegetable oil (the remaining 1 tablespoon will be used for the second waffle). The oil prevents sticking and helps create those crispy edges we're after. Spread the oil evenly with a paper towel—just a thin, even coating.
Watch for the waffle iron to reach its highest temperature setting before adding batter. You'll know it's ready when a drop of water sizzles and evaporates instantly on contact. This high heat is what gives those waffles their signature crispy exterior. If your iron has a non-stick coating, you can skip the oil entirely—but I still recommend it for maximum crispiness.
Cook the Waffles to Golden Perfection
Pour about ½ cup batter onto the center of the waffle iron, spreading it evenly to the edges. Close the iron and cook until the waffles are deep golden brown and the indicator light turns off (usually 4-5 minutes). You'll see steam rising and hear a satisfying sizzle—this is your cue that it's cooking properly. Don't open the iron too soon or the waffle will collapse.
Transfer the waffle to a wire rack and keep it warm in a 200°F oven while you cook the remaining batter. For the second waffle, add the remaining 1 tablespoon vegetable oil to the iron and repeat the process. The key to crispy edges is that high heat and proper oil application. If your waffles come out too pale, increase the heat next time or cook them a bit longer.
Serve Immediately with Extra Cheese
Serve the waffles straight from the iron while they're still warm and crispy. Top each one with additional sharp cheddar cheese if you're feeling extra indulgent—the cheese melts beautifully into those warm waffles. The combination of crispy edges, tender interior, and melty cheese creates the perfect texture contrast in every bite.
These waffles are best enjoyed immediately, but if you need to hold them for a few minutes, cover them loosely with aluminum foil to keep them warm. The crispiness will soften slightly over time, so serving right away ensures that perfect first bite. Pair with maple syrup, fresh berries, or a dollop of whipped cream for the ultimate breakfast experience.
Pro Tips For Making Bacon And Cheese Waffle
- MEASURE FLUIDS FIRST: I learned this the hard way—dry ingredients settle when you shake the bag, so scoop your flour and sugar directly from the container into the bowl. Pack it down lightly with a spoon, then level it off. That extra 2 tablespoons makes a difference when you’re trying to get the right rise.
- CRACK EGGS INTO COLD BOWL: Cold eggs mix smoother and don’t scramble when they hit the batter. Crack them into a separate bowl first, then whisk in—no lumps, no stress. (Yes, even if you’re impatient like me.)
- WAIT FOR GOLDEN BROWN: The waffle’s done when it’s deep golden, not pale. I used to pull them too soon, thinking they’d crisp up more later—wrong. A few extra seconds in the iron guarantees that perfect crunch, especially when you’re drowning them in syrup and cheese.
- USE COLD BUTTER IN BATTER: Cold, cubed butter creates pockets in the waffle for the cheese to melt into later. Skip the melted version unless you want dense, greasy results. Cut it into small pieces and fold them in gently—this isn’t the time to overmix.
Best sauces and condiments for bacon and cheese waffle
Maple-Bacon Glaze
This sweet-savory sauce takes these waffles to the next level. Heat ½ cup pure maple syrup with 2 tbsp chopped crispy bacon in a small saucepan over medium-low heat for 3-4 minutes.
Stir in 1 tsp apple cider vinegar for brightness, then brush generously over warm waffles. The smoky bacon enhances the maple's caramel notes while adding another layer of texture contrast. 🍁
Spicy Honey Butter
For a bold kick, mix ½ cup softened butter with ¼ cup honey and 1 tbsp cayenne pepper (adjust to taste). Spread this fiery concoction on waffles before adding cheese or bacon.
The heat cuts through the richness while the honey adds natural sweetness. I like to serve this with a side of cool Greek yogurt for dipping—it balances the heat beautifully.
Caramelized Onion Jam
Slow-cook 2 cups thinly sliced yellow onions in 2 tbsp butter over low heat for 45-60 minutes2 tbsp brown sugar and 1 tbsp balsamic vinegar at the end.
Spread this jam on waffles before adding cheese—it adds a sweet, jammy depth that pairs perfectly with the salty bacon and sharp cheddar.
Creamy Garlic Aioli
Blend ½ cup mayonnaise, 2 roasted garlic cloves, 1 tbsp lemon juice, and ½ tsp smoked paprika until smooth. Drizzle this garlicky sauce over waffles alongside extra bacon bits.
The creamy texture complements the crispy edges while the garlic enhances the savory flavors. For extra richness, add 1 oz cream cheese to the blend before whipping.
Berry-Bacon Compote
Simmer 1 cup mixed berries (strawberries, blueberries, raspberries) with 2 tbsp granulated sugar and 1 tbsp chopped bacon over medium heat for 8-10 minutes until berries break down.
Spoon this fruity-savory compote over waffles for a fresh contrast to the salty bacon and cheese. The acidity from the berries cuts through the richness perfectly. 🍓
Hot Chocolate Drizzle
For a decadent dessert-style topping, melt ½ cup dark chocolate chips with 2 tbsp heavy cream and 1 tbsp bacon fat (saved from cooking the bacon). Drizzle this rich chocolate sauce over waffles and sprinkle with crushed peppermint for a festive touch. The smoky-sweet combination is surprisingly delicious and makes these waffles feel like a special treat. Perfect for weekend brunch guests!
Nutrition facts
Frequently asked questions
Can I make these waffles without a waffle iron?
Use a cast-iron skillet over medium-high heat with 1 tablespoon butter or oil per waffle. Pour ½ cup batter and cook until bubbles form (2-3 minutes), then flip and cook another 2 minutes for crispy edges. The texture will be slightly different but still delicious.
Why did my waffles turn out gummy instead of crispy?
Gummy waffles usually mean the batter was too wet or the iron wasn't hot enough. Make sure your waffle iron reaches its highest setting (test with a drop of water—it should sizzle instantly). Also, don't overmix the batter, and use thick-cut bacon that's fully crisped before chopping.
Can I make these waffles ahead of time?
Yes! Cook the waffles and let them cool completely, then store in an airtight container at room temperature for 2 days. For longer storage, freeze them between parchment paper and reheat in a toaster or air fryer for 2-3 minutes to restore crispiness. Reheat from frozen for 3-4 minutes.
What's the best cheese substitute if I don't have cheddar?
Gouda or pepper jack work beautifully—they melt even better than cheddar. For a milder option, try monterey jack or mozzarella. If you're out of all cheese, add an extra 0.5 cup cream cheese for richness, but the texture will be slightly different. Avoid pre-shredded cheese—it gets clumpy when melted.
How do I make these waffles extra crispy?
Preheat your waffle iron on the highest setting for 5 minutes before adding batter, then brush the plates with vegetable oil (not butter). Use thick-cut bacon that's fully crisped, and cook the waffles until they're deep golden brown with no pale spots. Serve immediately to lock in that crispy texture.