
Appetizers
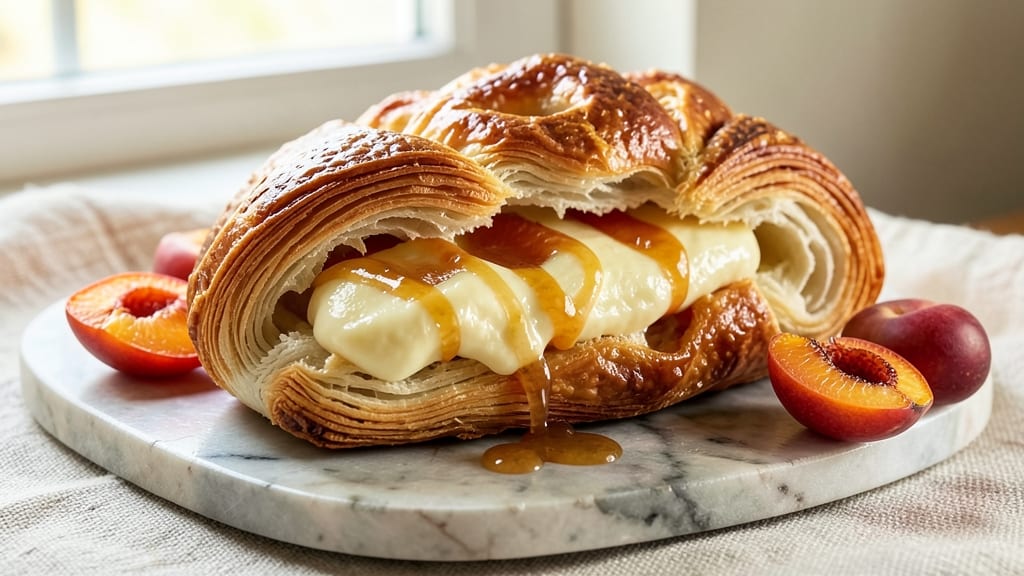
This apricot cheese Danish recipe delivers the perfect balance of flaky, golden layers and sweet-tart filling that rivals your favorite bakery. 💛 The secret lies in a well-layered laminated dough that creates those signature crispy, melt-in-your-mouth flakes, while the apricot and cheese filling adds just the right amount of sweetness and richness.
What sets this recipe apart is the foolproof technique for achieving that signature flaky texture—no advanced skills required. We'll start with a simple yeast-based dough that gets rolled and folded with butter to create hundreds of delicate layers.
The filling combines apricot preserves with cream cheese for a creamy, tangy contrast that pairs beautifully with the buttery crust.
By the time you pull these from the oven, you'll have golden-brown Danish pastries with crisp edges and tender centers, filled with a sweet-tart apricot cream that melts at the first bite.
The aroma alone will have everyone gathering in the kitchen, and the taste will make them forget about store-bought versions forever.
For those who love a little extra flavor, try adding cardamom to the dough or swapping the apricot for a raspberry filling. These Danish are perfect for breakfast, brunch, or even a special dessert. Let's get started on creating your own bakery-style treats at home!
Ingredients for apricot cheese danish
Buttery layers, sweet-tart filling, and bakery-style flakes—just 13 ingredients for golden Danish magic.
| Ingredient | Amount | Notes |
|---|---|---|
| All-Purpose Flour 🌾 | 4 cups | Sifted for light texture |
| Unsalted Butter 🧈 | 1 cup | Cold, cubed, European style |
| Granulated Sugar 🍚 | ¼ cup | Plus 1 tbsp for dough |
| Instant Yeast 🍞 | 2 ¼ tsp | Or active dry (1 tsp) |
| Large Eggs 🥚 | 1 whole | Room temperature |
| Whole Milk 🥛 | ¼ cup | Warm, 110°F |
| Salt 🧂 | ½ tsp | Diamond Crystal preferred |
| Apricot Preserves 🍑 | 1 cup | High-quality, no added sugar |
| Cream Cheese 🧀 | 8 oz | Full-fat, room temperature |
| Powdered Sugar 🍚 | ½ cup | For filling sweetness |
| Vanilla Extract 🌸 | 1 tsp | Pure, high-quality |
| Egg Yolk 🥚 | 1 whole | For egg wash |
| Turbinado Sugar 🍚 | ¼ cup | For sprinkling |
The butter is non-negotiable here. European-style butter (like Plugrá or Land O'Lakes European) has higher fat content for those signature flakes. Grab it from Whole Foods or the international aisle at Kroger—it's worth the splurge. For the flour, King Arthur or Gold Medal are my go-tos, but any all-purpose will do. The yeast? Fresh is better (check the refrigerated section), but instant works in a pinch. Keep an eye out for apricot preserves with minimal additives—Welch's or Bonne Maman are solid choices, but read the label. The cream cheese should be full-fat (none of that low-fat nonsense) and at room temperature for smooth filling.
No European butter? Regular unsalted butter works, but chill it extra long before folding. Running short on preserves? Swap for apricot jam or even raspberry preserves—just add a pinch of cardamom if you're feeling fancy. The egg wash can be made with just milk if you're out of eggs (though it won't be as golden). For the dough, if you don't have a kitchen scale, use the finger test: cold butter should hold its shape when pressed gently. The filling can be prepped ahead—it actually tastes better after sitting overnight as the flavors meld. And if you're worried about the dough getting too sticky? Chill it between folds—that's the secret to those perfect layers.
Dough keeps 24 hours wrapped in plastic in the fridge—pull it out to soften before rolling. The filling can be made 2 days ahead and stored in the fridge. For the finished Danish, they're best eaten warm but keep beautifully for 3 days wrapped in a cool, dry place. Freeze the shaped (but unbaked) Danish for up to 1 month—bake straight from frozen with 5 extra minutes. Pro tip: Brush the warm pastries with a little apricot preserve glaze (mix 2 tbsp preserves with 1 tsp water) for extra shine.
Why You'll Love This Recipe
- You’re using pantry staples: flour, butter, sugar. No specialty ingredients, no markup. The result? A bakery-worthy pastry that costs a fraction of what you’d pay elsewhere. (Leftovers? They’re my favorite.)
- No-Knead Magic: I swear by this dough—just mix, let it rest, and roll. No stand mixer, no fancy skills, just a bowl and patience (the good kind). That butter swirled in? It’s chef’s kiss with zero effort.
- Sweet-Savory Balance: The apricot jam glaze cuts through the creamy cheese filling like a perfect hug. Rich, tangy, and just enough sweetness—it’s the kind of pastry that makes you pause mid-bite. (Yes, even on a Tuesday.)
- Breakfast or Snack: These vanish at brunch but also work as a grab-and-go treat. Pack one for your lunchbox or serve a batch at a potluck—no one will guess how little work went into them.
Step-by-step instructions for apricot cheese Danish
Here's how to create those signature flaky layers and sweet-tart filling—no shortcuts, just perfect results.
👨🍳 Step 1: Make the Danish Dough
In a large bowl, whisk together the 4 cups all-purpose flour, 2.25 tsp instant yeast, 0.5 tsp salt, and 0.25 cup granulated sugar. Cut in the 1 cup cold unsalted butter using a pastry cutter or your fingers until the mixture resembles coarse crumbs with pea-sized butter pieces.
Make a well in the center and add the 1 whole large egg and 0.25 cup warm whole milk. Mix gently with a wooden spoon until just combined—you want a shaggy dough that comes together when pressed. Turn it out onto a lightly floured surface and knead lightly for 30 seconds until smooth. Wrap in plastic and refrigerate for 1 hour.
🍳 Step 2: Roll and Layer the Dough
Roll the chilled dough on a floured surface into a 12x18-inch rectangle about ⅛-inch thick. Spread the 8 oz cream cheese evenly over the dough, leaving a ½-inch border uncovered. Sprinkle with the 0.5 cup powdered sugar and 1 tsp vanilla extract, then fold the dough into thirds like a letter, sealing the edges well.
Roll the folded dough into a 12x18-inch rectangle again, then fold into thirds once more. Wrap tightly in plastic and refrigerate for 30 minutes. This layering creates those signature flaky layers—don't skip it!
🍳 Step 3: Shape and Proof the Danish
Roll the dough out one final time into a 12x18-inch rectangle and cut into 6 equal rectangles. Gently roll each rectangle up from the long side, pinching the seam to seal. Place on a parchment-lined baking sheet, seam-side down, and cover with a clean kitchen towel. Let rise at room temperature for 1-1.5 hours until puffy.
While proofing, preheat your oven to 375°F. The danishes are ready when they've nearly doubled in size and feel light when pressed gently. If they rise too quickly, refrigerate for 15 minutes to slow the process.
🔥 Step 4: Bake to Golden Perfection
Brush the risen danishes with the 1 whole egg yolk mixed with 1 tablespoon water for a golden finish. Sprinkle evenly with the 0.25 cup turbinado sugar. Bake for 15-18 minutes until golden brown and internal temperature reaches 190°F.
Remove from oven and immediately spread 1 cup apricot preserves evenly over each danish. Let cool for 10 minutes before serving—this gives the preserves time to set slightly but keeps them spreadable.
Pro Tips For Making Apricot Cheese Danish
- CHILL THE DOUGH: Let the laminated butter rest in the fridge for at least 30 minutes before rolling—yes, even if you’re eager to start. I used to skip this and ended up with tough, uneven layers that fought back every time I tried to fold them. The butter needs to firm up just enough to slice cleanly without sticking to the knife.
- USE COLD BUTTER: Measure your unsalted butter straight from the fridge (not softened) and cut it into 1-inch cubes before mixing with flour. Cold butter creates flaky layers that actually separate when baked, not a sad, dense brick. I learned this after making a batch where the butter melted too fast, and the danishes turned out more like shortbread than pastry.
- WEIGH THE FLOUR: Scoop and level your all-purpose flour into a kitchen scale—no guessing with cups, especially if you’re above sea level. Flour settles differently every time you open the bag, and even a tablespoon extra can throw off the dough’s texture. I finally stopped eyeballing it after my first batch came out gummy and refused to rise properly.
- BRUSH WITH EGG WASH: Whisk the large egg with a splash of water (about 1 tablespoon) for the egg wash—it’s thinner than you’d think but sticks better than straight egg. Brush it on the shaped danishes right before baking, focusing on the tops and edges. This isn’t just for looks; it seals the layers so they don’t dry out while baking. I used to skip it, and the crust always ended up cracking.
Pro cooking tips for this recipe
Cold Butter Magic
Never skip chilling your butter before folding it into the dough—this is the single most important step for achieving those signature flaky layers. I recommend using a Plugrá European-style butter straight from the fridge, cut into ½-inch cubes.
Place them in the freezer for 10 minutes before mixing to ensure they stay firm. When you fold the dough, each cold butter cube will create hundreds of tiny pockets that melt into steam during baking, creating those crispy, airy layers. 🧈
Layering Like a Pro
For maximum flakiness, focus on three key folds: the first after spreading the cream cheese, and two more after resting. Roll the dough into a 12x18-inch rectangle each time, and fold it into thirds like a letter. Seal the edges tightly with your fingers to prevent filling from leaking out.
After each fold, wrap the dough in plastic and refrigerate for 30 minutes—this keeps the butter cold and prevents the dough from sticking. I promise, those extra minutes of chilling are worth the golden, crispy results. ✨
Proofing Perfection
Proofing is where the magic happens, but it's easy to overdo it. Your danishes should rise until they've nearly doubled in size and feel light when pressed gently—this usually takes 1-1.5 hours at room temperature.
If your kitchen is warm, slow the process by refrigerating the shaped danishes for 15 minutes before baking. Overproofed dough will collapse in the oven, so keep an eye on them. A good rule of thumb: they should spring back slowly when poked with your finger. 💡
Egg Wash Secrets
Don't just brush your danishes with plain egg wash—this is where you create that bakery-style shine. Mix 1 whole egg yolk with 1 tablespoon water and a pinch of salt for extra crispiness. The salt helps the sugar caramelize faster, giving you that beautiful golden-brown crust.
For an extra touch, sprinkle turbinado sugar right after brushing—it'll melt into a crunchy crust while baking. Pro tip: Use a pastry brush with stiff bristles to get an even coat without tearing the dough. 🍚
Filling Timing
Spread the apricot preserves immediately after baking while the danishes are still warm. The residual heat helps the preserves melt slightly, creating that perfect gooey texture.
If you're making these ahead, brush the baked danishes with a little apricot preserve glaze (mix 2 tablespoons preserves with 1 teaspoon water) while still warm, then let cool completely before adding the filling. This keeps them looking fresh and prevents soggy bottoms. 🍑
Oven Temperature Control
Preheat your oven to 375°F and place a baking sheet on the middle rack—this ensures even heat distribution. If your oven runs hot, reduce the temperature to 350°F and add 2-3 minutes to the baking time.
Use an oven thermometer to check your oven's accuracy—many home ovens are off by 25°F or more. The danishes are done when they're golden brown and reach an internal temperature of 190°F.
Let them cool for 10 minutes before serving so the filling sets slightly but stays spreadable. 🌡️
Nutrition facts
Frequently asked questions
Can I make this recipe without a stand mixer?
This recipe only requires a pastry cutter or your fingers to cut the butter into the flour. For the dough, a wooden spoon works perfectly for mixing the wet ingredients. The key is keeping everything cold—don't overwork the dough, just fold it gently until it comes together.
How do I store leftover apricot cheese Danish?
Wrap cooled Danish in plastic wrap and store at room temperature for up to 3 days. For longer storage, freeze them unbaked for 1 month or baked for 2 weeks. To reheat, warm in a 350°F oven for 5-10 minutes until golden. The filling may firm up slightly but softens with heat.
What if my dough doesn't rise enough?
Check your yeast first—it should be fresh. If using instant yeast, make sure it's within the expiration date. Try placing the dough in a warmer spot (like near the oven with it off) or cover it with a damp towel to create a humid environment. If it still doesn't rise, your kitchen might be too cold—try proofing near a heat source.
Can I substitute cream cheese for something else?
Yes! For a lighter texture, use 8 oz mascarpone cheese mixed with 1 tbsp powdered sugar. For a tangier flavor, try ricotta cheese (drained) combined with 2 oz cream cheese. Both work well but may alter the filling's consistency slightly. Adjust sweetness as needed.
Why did my Danish turn out dense instead of flaky?
This usually happens when the butter melts during folding or the dough isn't chilled enough between layers. Always keep butter cold (freeze cubes for 10 minutes before using) and refrigerate the dough for 30 minutes after each fold. Also, avoid overworking the dough—handle it gently to maintain those delicate butter layers.