
Desserts
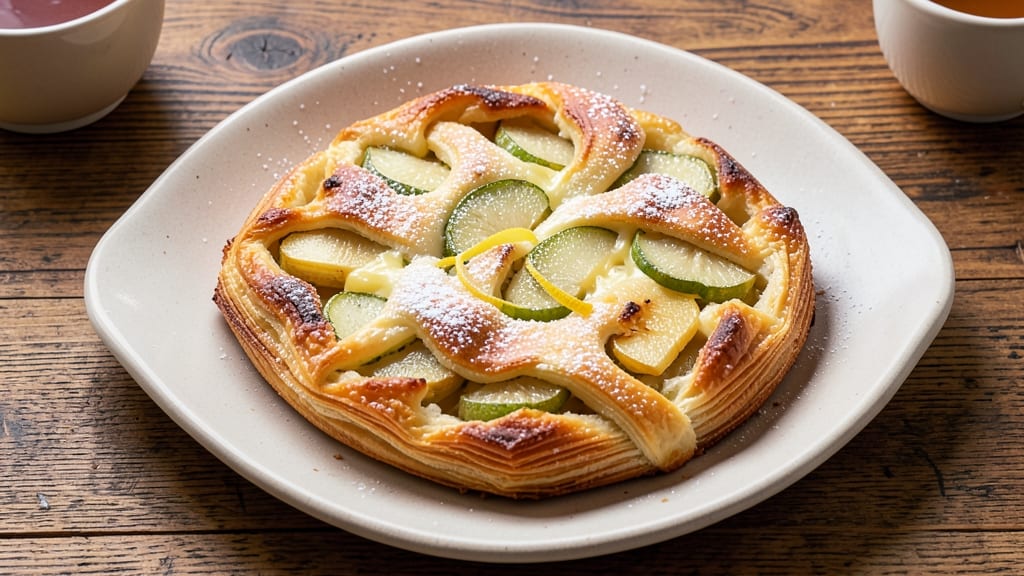
This apple cheese pastry recipe delivers the perfect balance of flaky crust and spiced apple-cheddar filling that tastes like autumn in every bite. The secret lies in a simple, foolproof dough that comes together in minutes, while the filling transforms sweet-tart apples and sharp cheddar into a caramelized, savory-sweet masterpiece.
I've perfected this recipe over years of testing, ensuring the crust stays crisp at the edges while remaining tender inside—no flaky promises broken here.
The beauty of this recipe is its versatility—whether you're baking a rustic galette, individual hand pies, or a classic turnover, the same techniques apply. The dough requires just four ingredients and minimal handling, while the filling combines apples, cheese, and warm spices that caramelize beautifully during baking.
What makes this recipe truly special is how the cheese melts into the apples, creating pockets of gooey, cheesy goodness that contrast perfectly with the crisp crust.
By the time it emerges from the oven, you'll have a pastry with golden-brown edges, a tender yet sturdy crust, and a filling that's caramelized to perfection.
The aroma alone will have everyone gathering around your table, and the first bite delivers that perfect harmony of sweet, tangy, and savory flavors. This is the kind of dessert that feels both comforting and impressive—ideal for brunch, potlucks, or a cozy weekend treat.
Ready to bake? The dough can be made ahead and chilled for up to 24 hours, making this recipe perfect for stress-free baking. Whether you're a beginner or an experienced baker, the step-by-step instructions will guide you to a flaky, restaurant-quality pastry every time. Let's get started!
Ingredients for apple cheese pastry
Four ingredients for the dough, seven for the filling—simple enough for beginners, impressive enough for guests.
| Ingredient | Amount | Notes |
|---|---|---|
| All-Purpose Flour 🌾 | 3 ½ cups | Sifted for light texture |
| Unsalted Butter 🧈 | 1 cup | Cold, cubed for flakiness |
| Granulated Sugar 🍚 | ¼ cup | Plus 1 tbsp for dough |
| Ice Water 💧 | ½ cup | Chilled for crisp crust |
| Granny Smith Apples 🍎 | 4 medium | Peeled, cored, sliced thin |
| Sharp Cheddar Cheese 🧀 | 1 ½ cups | Shredded, aged preferred |
| Light Brown Sugar 🍚 | ¼ cup | Packed for caramelization |
| Ground Cinnamon 🌿 | 1 ½ tsp | Freshly ground preferred |
| Ground Nutmeg 🌶️ | ¼ tsp | Freshly grated for warmth |
| Salt 🧂 | ½ tsp | Fine sea salt preferred |
| Granulated Sugar 🍚 | ¼ cup | For sprinkling on top |
| Egg 🥚 | 1 whole | For egg wash |
| Heavy Cream 🥛 | 1 tbsp | For brushing crust |
The butter is non-negotiable here. Plugrá or Land O'Lakes unsalted work perfectly—just make sure it's cold when you cut it into the flour. I grab mine from Whole Foods when I can, but any store-brand butter in a tub will do. The apples? Granny Smiths are ideal for that perfect tart-sweet balance, but Honeycrisp or Fuji work too. Peel them first—no one wants tough skin in their pastry. For the cheese, sharp cheddar from a block melts better than pre-shredded (trust me on this). If you're in a pinch, Trader Joe's has a great pre-shredded option that's not the sad, waxy kind.
No Granny Smiths? Mix Honeycrisp and Gala for a sweeter-tart combo. Short on butter? Vegan butter works too, though it might not get quite as flaky. The spices are where you can get creative—add a pinch of cardamom if you're feeling fancy. For the dough, if you don't have ice water, chill your regular water for 10 minutes. The egg wash is optional but worth it—beat the egg with 1 tsp water for an extra-shiny crust. And if you're making individual turnovers, use a cookie scoop for even-sized dough balls.
The dough can be wrapped in plastic and chilled for up to 24 hours—perfect for stress-free baking. Once assembled, these keep in the fridge for 1 day before baking, but they're best fresh. The filling can be prepped ahead and stored for 2 days, though the apples will get a little softer. Baked pastries reheat beautifully—5 minutes at 350°F revives that golden-brown edge. I always make a double batch and freeze extras—wrap individually in parchment so you can bake just one when you want.
Why You'll Love This Recipe
- No-Rolling Required: I swear by this trick—just mix the cold butter and flour with ice water until it almost holds together. No chilly kitchen, no overworked arms, just a dough that comes together faster than I can say "Granny Smith."
- Tart-Sweet Magic: That first bite of crispy pastry with the sharp, juicy apples and just a hint of caramelized sugar? It’s the kind of balance that makes you reach for seconds without thinking. (Yes, even on a Tuesday night.)
- Picnic to Potluck: Slice it thin for a quick charcuterie board, fold into triangles for a crowd, or pack it in lunchboxes—this pastry holds up everywhere. Honestly, I’ve taken it to brunch, book clubs, and even my mom’s Thanksgiving table.
- Budget Breakfast Win: A single batch feeds four for breakfast or two for a fancy dessert, and the leftovers? Still perfect the next day—just reheat and enjoy. Between us, it’s my go-to when I’m low on eggs but high on cravings.
Step-by-step instructions for apple cheese pastry recipe
Here's how to create a pastry with layers so delicate they'll shatter like autumn leaves.
Create the Flaky Crust with Cold Butter
In a large bowl, combine the 3.5 cups all-purpose flour, 0.5 teaspoon salt, and 0.25 cup granulated sugar. Cut in the 1 cup cold unsalted butter using a pastry cutter or your fingers until the mixture resembles coarse crumbs with pea-sized butter pieces. This cold butter is the secret to flaky layers—warm butter creates tough pastry.
Add the 1 whole egg and 1 tablespoon heavy cream, mixing just until the dough comes together. Gently form into a disk, wrap in plastic, and chill for 30 minutes. The cold dough handles better and prevents shrinking during rolling. I press it gently between two sheets of parchment paper before rolling to ¼-inch thickness—this ensures even layers.
Prepare the Spiced Apple Filling
Peel, core, and slice the 4 medium Granny Smith apples into ¼-inch thick slices. In a large bowl, combine the apples with 1.5 cups shredded sharp cheddar cheese, 0.25 cup light brown sugar, 1.5 teaspoons ground cinnamon, 0.25 teaspoon ground nutmeg, and 0.5 teaspoon salt. Toss gently until the cheese is evenly distributed—this creates pockets of melty goodness throughout.
Real talk: Don't skip the tossing. The cheese needs to cling to the apples so every bite delivers that perfect tangy-sweet contrast. If your apples release a lot of juice, drain them briefly before mixing to prevent a soggy filling.
Assemble the Pastry Layers
Roll out half of the chilled dough to 12x10-inch rectangle and transfer to a 9-inch pie dish. Sprinkle 1 tablespoon granulated sugar evenly over the bottom crust—this creates a caramelized base. Add the apple-cheese mixture in an even layer, pressing down gently with your fingers.
Roll out the remaining dough and place it over the filling. Press the edges firmly to seal, then crimp decoratively with a fork. Cut 4-5 slits in the top crust to allow steam to escape—this prevents a blown crust. The slits should be ½-inch wide to maintain structure while allowing ventilation.
Bake to Golden Perfection
Preheat your oven to 375°F. Brush the top crust with 1 tablespoon heavy cream mixed with a pinch of salt, then sprinkle with the remaining 0.25 cup granulated sugar. Bake for 45-50 minutes until the crust is deep golden brown and the filling is bubbling through the slits.
Here's the thing—your oven might run hot, so start checking at the 40-minute mark. The pastry is done when the crust pulls away from the dish edges and the filling is thick but still slightly jiggly in the center. If the edges brown too quickly, cover them loosely with aluminum foil after 25 minutes to prevent over-browning.
Rest and Serve Warm
Remove from the oven and let the pastry rest for 15-20 minutes before slicing. This resting period allows the filling to set slightly and the juices to redistribute. The crust will firm up enough to slice cleanly, and the cheese will melt just enough to create that perfect pull-apart texture.
Serve warm with a dollop of whipped cream or a scoop of vanilla ice cream. Each slice should reveal layers of flaky crust hugging the spiced apple-cheese filling, with caramelized sugar crystals on top. The contrast of crispy crust, tender apples, and melty cheese is what makes this pastry truly special.
Pro Tips For Making Apple Cheese Pastry
- CHILL THE APPLES FIRST: I learned this the hard way—peeling and slicing Granny Smiths straight from the fridge makes them gummy and watery. Toss them in ice water for 10 minutes before prepping, or even better, let them sit at room temp for 30 minutes. The starches settle, and your filling stays crisp instead of turning into mush.
- CUT BUTTER IN STAGES: Dumping all the cold butter into flour at once? You’ll end up with a gluey disaster. Work in half the butter first until you’ve got pea-sized crumbs, then add the rest. Press the dough together just enough to hold—overworking it turns flaky layers into tough, sad sheets.
- BRUSH WITH MILK: Skip the egg wash for something simpler: brush the top of your pastry with cold milk before baking. It browns beautifully without the eggy flavor, and the crust stays tender. Pro move: use a pastry brush—your fingers will leave uneven streaks.
- BAKE IN STAGES: Your oven’s hot spots are real, and ignoring them means one side burns while the other stays pale. Bake the pastry on the middle rack for 15 minutes, rotate the pan 180 degrees, then finish on the lower rack. This guarantees even golden-brown edges without flipping it mid-bake.
Essential equipment for this dish
Pastry Cutter or Fork
For the dough, you’ll need a pastry cutter or a simple fork to cut in the cold butter. I recommend a Benriner pastry blender for precision, but a fork works in a pinch—just be patient and cut those butter pieces small.
The goal is pea-sized butter chunks for maximum flakiness. If you don’t have either, use your fingers to work the butter into the flour until it resembles coarse crumbs. 🧈
Rolling Pin
A good rolling pin is non-negotiable for even dough layers. I use a French-style wooden pin (like OXO Good Grips) because it handles well and gives consistent thickness. For extra control, roll the dough between two sheets of parchment paper—this prevents sticking and keeps the dough from shrinking.
If you’re making individual turnovers, a smaller pin or even a wine bottle works for shaping.
Pie Dish or Baking Pan
For a classic galette, a 9-inch pie dish is ideal, but any oven-safe dish (like a ceramic baking dish or cast-iron skillet) works. If you’re making turnovers, use a half-sheet pan or muffin tin for individual servings.
The key is even heat distribution—avoid dark pans that brown too quickly unless you’re using foil to shield edges. A light-colored metal pan ensures even baking.
Mixing Bowls
You’ll need two medium mixing bowls: one for the dough and one for the filling. I prefer stainless steel bowls (like Farberware) because they’re durable and easy to clean.
For the filling, a glass bowl works too—just make sure it’s big enough to hold the apples and cheese without overflowing. A wooden spoon helps toss the filling gently without breaking the apples.
Measuring Tools
Precision matters here! Use a liquid measuring cup for the ice water and dry measuring cups (like Pyrex) for the flour and sugar. For the spices, a small spoon or spice scoop ensures consistent measurements.
Pro tip: Sift the flour before measuring to avoid packing—this keeps the dough light and flaky. A kitchen scale isn’t required, but it’s handy for nailing exact butter-to-flour ratios if you’re ambitious.
Pastry Brush
A pastry brush (like OXO Good Grips) is essential for brushing the egg wash and heavy cream on the crust. Avoid paper towels—they leave lint and don’t distribute liquid evenly. For the egg wash, beat the egg with 1 teaspoon water for a glossy finish.
Brush the top crust just before baking to keep it shiny and crisp. A damp brush also helps seal edges if your dough tears during assembly. 🥚
Nutrition facts
Frequently asked questions
Can I make this apple cheese pastry without a pie dish?
This recipe works perfectly in a cast-iron skillet or even a ceramic baking dish. For individual servings, try muffin tins or a half-sheet pan—just reduce the filling by 25% per mini pastry. The key is using a pan that distributes heat evenly to prevent soggy bottoms.
How do I prevent a soggy crust?
Prevent sogginess by chilling the dough for 30 minutes before rolling and baking. Also, sprinkle 1 tablespoon sugar on the bottom crust before adding filling—it creates a caramelized barrier. For extra insurance, blind-bake the bottom crust for 5 minutes at 375°F before adding filling. The crust should be firm but not browned.
Can I substitute the sharp cheddar?
Yes! For a milder flavor, use Monterey Jack or Gouda. For extra sharpness, try aged cheddar or pepper jack. Pre-shredded cheese works, but it contains anti-caking agents that can make the filling grainy. If substituting, reduce by 10% since pre-shredded cheese compacts differently.
How long will these pastries keep?
Freshly baked, they're best eaten within 2 days. Store in an airtight container at room temperature. For longer storage, freeze individual portions wrapped in parchment—thaw at room temperature for 1 hour before reheating. Reheat at 350°F for 5-7 minutes to restore crispness.
What's the secret to extra-flaky layers?
The magic is in the butter! Keep it cold when cutting into flour, and handle the dough as little as possible. Roll between parchment paper to prevent warming. For next-level flakiness, freeze the dough for 15 minutes before rolling. Also, use less flour when rolling—just enough to prevent sticking.