
Main Courses
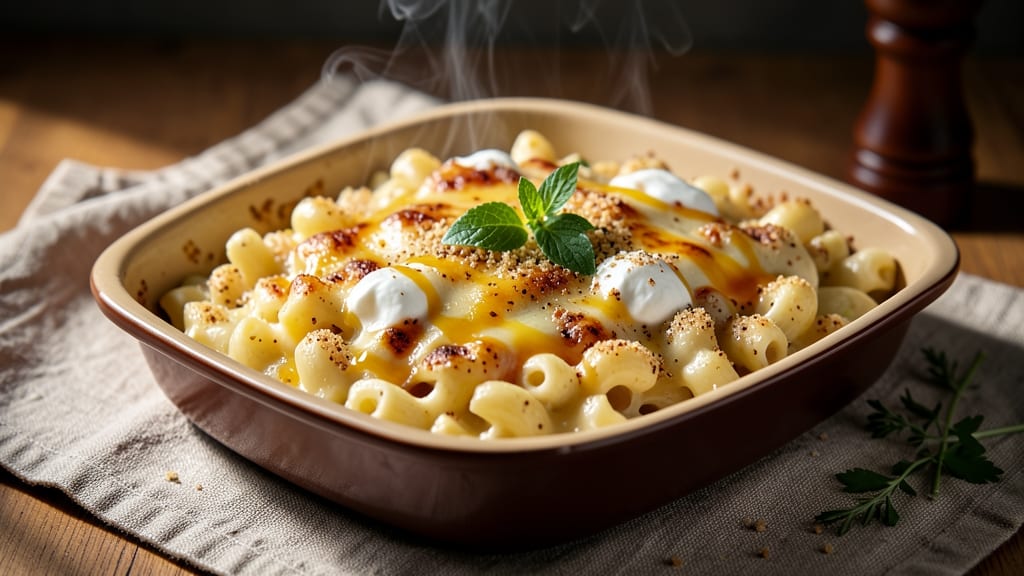
This 9 x 13 mac and cheese recipe delivers the ultimate comfort food experience—extra-creamy layers topped with crispy breadcrumbs that become irresistibly golden.
The secret lies in a rich, velvety cheese sauce that clings to every elbow macaroni, creating a casserole so satisfying it disappears faster than you can say "second helping." I've perfected this technique over years of baking, ensuring the sauce stays luscious while the top develops that coveted crunch.
The foundation of this recipe is a foolproof cheese sauce made with sharp cheddar, Gruyère, and cream cheese, all blended into a smooth, thick consistency. The key to that perfect texture? Cooking the roux properly and letting the sauce simmer until it's silky smooth before mixing in the pasta.
This method guarantees a sauce that won't separate or turn greasy, even after baking. Every bite delivers that creamy perfection you crave, with just the right balance of tangy and rich flavors.
What sets this dish apart is the crispy breadcrumb topping—a simple but essential step that transforms an already delicious casserole into something extraordinary. The breadcrumbs toast to a golden-brown finish while staying crunchy, providing a satisfying contrast to the soft, cheesy layers beneath.
This recipe is designed to impress, whether you're feeding a crowd for a holiday gathering or treating yourself to a well-deserved comfort meal on a chilly evening.
Ready in just 30 minutes, this mac and cheese is perfect for busy weeknights or special occasions. The 9 x 13 pan ensures even baking, and the recipe scales easily for larger groups.
Serve it as a main dish with a crisp green salad or as a side to complement grilled meats. Here's how to make it—simple, creamy, and crispy every time.
Ingredients for 9 x 13 mac and cheese
This creamy, crispy mac and cheese needs just 13 simple ingredients to become your new favorite comfort dish.
| Ingredient | Amount | Notes |
|---|---|---|
| Elbow Macaroni 🍝 | 12 oz | Dry, uncooked pasta |
| Sharp White Cheddar Cheese 🧀 | 4 oz | Shredded, sharp variety |
| Gruyère Cheese 🧀 | 4 oz | Shredded, nutty flavor |
| Cream Cheese 🧈 | 8 oz | Full-fat, room temperature |
| Heavy Whipping Cream 🥛 | 1 cup | Full-fat for richness |
| Unsalted Butter 🧈 | 4 tbsp | Cold, cubed for roux |
| All-Purpose Flour 🌾 | 2 tbsp | For roux thickening |
| Diamond Crystal Kosher Salt 🧂 | 1 ½ tsp | Adjust to taste |
| Freshly Ground Black Pepper 🌶️ | ½ tsp | Freshly cracked |
| Panko Breadcrumbs 🍞 | ½ cup | For crispy topping |
| Extra-Virgin Olive Oil 🫒 | 1 tbsp | For breadcrumb crispiness |
| Garlic Powder 🧄 | ½ tsp | Optional for extra flavor |
| Dried Parsley 🌿 | ¼ tsp | For garnish |
The cheese trio is non-negotiable here. Sharp white cheddar brings the tang, Gruyère adds nutty depth, and cream cheese delivers that signature velvety texture. Whole Foods or Trader Joe's carry excellent pre-shredded options, but I always buy blocks and grate them myself—freshly grated melts so much better. For the Gruyère, look for aged varieties (at least 12 months) for maximum flavor. The macaroni should be elbow shape—it holds sauce better than penne or shells. Barilla or De Cecco are my go-tos for that perfect al dente bite.
No sharp cheddar? Extra-sharp white cheddar works in a pinch, but you'll lose some of that bright tang. Gruyère too pricey? Parmesan at half the amount adds umami, though it won't be identical. The cream cheese must be full-fat—Philadelphia brand is foolproof. For the breadcrumbs, Panko is essential (it stays crispy), but if you're out, regular breadcrumbs toasted in the oven work too. The garlic powder is optional but adds a subtle depth that makes this dish feel restaurant-quality—trust me on that.
This casserole reheats beautifully—5 minutes at 350°F brings it back to creamy perfection. For make-ahead meals, assemble the dish (without baking) and refrigerate for up to 24 hours before baking. The leftovers? Even better the next day as the flavors meld. Store any extra sauce in a jar with a thin layer of olive oil on top to preserve freshness for 3 days. The crispy topping loses its crunch when reheated, so always make a fresh batch for serving.
Why You'll Love This Recipe
- One-Pot Magic: I swear by this recipe because it’s literally one pot—no strainer, no extra bowls, no mess. Just boil the elbows, drain right into the baking dish, and stir in that velvety Gruyère-cheddar cream sauce. My counter stays clean while my taste buds celebrate.
- Creamy Crunch Perfection: That crispy top layer? Chef’s kiss. The Gruyère melts into a golden crust while the sharp cheddar keeps it sharp—no mushy middle here. The cream cheese adds that luxurious silkiness, and the heavy cream ties it all together like a hug from a food god.
- Game for Any Gathering: Serve it as a casserole for dinner parties, cut into squares for tailgates, or pack it in a thermos for a picnic. Honestly, I’ve taken it to potlucks, game nights, and even my mom’s house (she still asks for the recipe). It’s the dish that does the work for you.
- Leftovers That Don’t Suck: Most mac and cheese turns into sad, dry glue the next day. Not this one. The cream cheese keeps it creamy, and the cheeses don’t separate—just reheat and enjoy. I make a double batch on Sundays because it’s my secret weapon for lazy weeknights. (Yes, even on a Tuesday night.)
Step-by-step instructions for extra-creamy 9x13 mac and cheese
This method delivers restaurant-quality mac and cheese with a velvety sauce and irresistible crispy topping—every bite is pure comfort.
Cook the Elbow Macaroni to Perfect Al Dente
Bring a large pot of water to a rolling boil and add the 12 oz elbow macaroni. Stir immediately to prevent sticking. Cook for 11-12 minutes until the pasta is al dente—you should still feel a slight resistance when biting into it. Drain the pasta in a colander, but don't rinse it. The surface starch helps create that ultra-creamy sauce we're after.
While the pasta cooks, I like to prepare the cheese mixture in advance. This keeps everything moving smoothly and prevents the cheese from over-melting before it hits the oven. Pro tip: If you're using a large pot, consider cooking the pasta in batches to avoid overcrowding—this ensures even cooking and prevents the water from cooling too quickly.
Make the Ultra-Creamy Cheese Sauce
In a large, deep baking dish (your 9x13-inch pan), melt the 4 tbsp unsalted butter over medium-low heat until it's completely liquid but not browned. Add the 2 tbsp all-purpose flour and whisk vigorously for 1-2 minutes until you have a smooth, pale roux. This is your sauce's secret weapon—it creates that silky, velvety texture that separates good mac and cheese from great.
Gradually whisk in the 1 cup heavy whipping cream, 8 oz cream cheese, 4 oz sharp white cheddar, and 4 oz gruyère. The cream cheese should melt completely, creating a thick, luxurious base. Season with the 1.5 tsp kosher salt and 0.5 tsp freshly ground black pepper. Here's where the magic happens: stir in the drained pasta and let the mixture sit for 2-3 minutes so the cheese fully melts and clings to every noodle.
Prepare the Crispy Breadcrumb Topping
In a small bowl, combine the 0.5 cup panko breadcrumbs, 1 tbsp extra-virgin olive oil, 0.5 tsp garlic powder, and a pinch of salt. Mix until the breadcrumbs are evenly coated and look dry but oily. This topping is what gives your mac and cheese that irresistible crunch—don't skip the olive oil, as it helps create that golden, crispy finish.
Spread the breadcrumb mixture evenly over the top of the mac and cheese, pressing down gently with the back of a spoon. This ensures the topping stays put during baking and toasts to perfect crispiness. For extra flavor, you can sprinkle the 0.25 tsp dried parsley over the breadcrumbs before baking—it adds a fresh, herby note that brightens the rich cheese.
Bake to Golden Perfection
Preheat your oven to 375°F while you prepare the dish. Place the baking dish on the middle rack and bake for 20-25 minutes, until the top is deep golden brown and the edges are bubbling. The cheese sauce should be fully melted and glossy, with a crispy, crackly crust on top. If you're unsure, peek at 20 minutes—ovens vary, and you want that topping to be golden, not burnt.
Let the mac and cheese rest for 5-10 minutes before serving. This gives the sauce time to set slightly, making it easier to slice and serve. The contrast between the creamy, cheesy interior and the crispy, garlicky topping is what makes this dish truly special. Serve it warm with a side of steamed broccoli or a simple green salad for a complete meal.
Pro Tips For Making 9 X 13 Mac And Cheese
- Cook Pasta Al Dente: Elbows should have just a slight bite—no mushy centers, no crunch. I learned this the hard way: overcooked pasta turns to glue in the oven. Taste-test a piece right after draining, and if it’s not firm enough, toss it back in the pot for 30 seconds with a splash of pasta water.
- Shred Cheese Like a Pro: Skip the food processor—it turns cheese into paste. Use a box grater for sharp cheddar and Gruyère, then pulse the cream cheese separately for smoothness. Mixing textures makes the sauce richer, but blending everything too finely kills the depth.
- Temper the Cream: Cold cream cheese and heavy cream straight from the fridge will seize the sauce. Warm the cream in a saucepan over low heat until it’s just steaming, then whisk in the softened cream cheese. The sauce will come together instantly—no lumps, no stress.
- Bake Covered First: The first 20 minutes under foil guarantee even cooking and a creamy center. I used to bake it uncovered, and the top would brown too fast while the middle stayed doughy. After that, uncover and broil for 2–3 minutes to crisp the top—just watch it like a hawk.
Essential equipment for this dish
Baking Dish Essentials
Your 9x13-inch baking dish is the star of this recipe, so choose one with 2-3 inch sides for easy mixing and even baking. I recommend ceramic or glass dishes—they distribute heat beautifully and prevent scorching. My go-to is a CorningWare dish because it handles temperature shifts without cracking.
If you're using metal, opt for heavy-gauge stainless steel to prevent hot spots. Never use dark-colored pans—they absorb too much heat and can burn the breadcrumb topping before the center is done. 🔥
Mixing Tools
A wooden spoon is your best friend for stirring the cheese sauce—it won’t scratch your baking dish like metal. I also keep a rubber spatula on hand to scrape up any stubborn cheese clinging to the sides.
For mixing the breadcrumb topping, a small mixing bowl (like a 2-cup Pyrex) works perfectly. Pro tip: Use a fine-mesh strainer if you’re grating your own cheese—it keeps the sauce silky smooth without gritty bits.
Cheese Prep Gear
Freshly grated cheese makes all the difference, so invest in a box grater (I love the Microplane) for quick, even shreds. If you’re using pre-shredded cheese, a fine-mesh sieve helps remove anti-caking agents that can make the sauce grainy.
For melting cheese efficiently, a double boiler or heatproof mixing bowl over a saucepan keeps temperatures stable. And don’t forget a small offset spatula—it’s perfect for spreading the breadcrumb topping evenly.
Oven Thermometer
Your oven’s temperature display isn’t always accurate, so a digital oven thermometer (like the Thermoworks Oven Thermometer) is a game-changer. I’ve seen ovens run 25°F hotter or colder than set—this ensures your mac and cheese bakes at the perfect 375°F for that golden, crispy topping.
Place it near the middle rack where your dish will sit. A little extra precision goes a long way when you’re aiming for that perfect texture. ✨
Optional Extras
For a crispier topping, a wire cooling rack placed over a baking sheet helps drain excess moisture while toasting. If you’re adding extra toppings (like bacon or jalapeños), a small bowl for mixing them into the sauce keeps things tidy.
And for serving, a sharp chef’s knife and cutting board make slicing clean, even portions effortless. These extras aren’t mandatory, but they elevate the dish from homemade to restaurant-quality.
Nutrition facts
Frequently asked questions
Why does my mac and cheese sauce get grainy?
Grainy texture usually happens when cheese doesn't melt smoothly. The fix? Always grate your own cheese (pre-shredded has anti-caking agents) and melt it gently over low heat. For extra silkiness, whisk in 1 tbsp cornstarch with the flour in your roux. Also, never let the sauce boil vigorously—keep it at a gentle simmer.
Can I make this ahead of time?
Assemble the dish (without baking) and refrigerate for up to 24 hours before baking. For make-ahead meals, cover tightly with foil and bake straight from the fridge at 350°F for 30-35 minutes. The flavors actually improve overnight as the cheese melds. Just add 5 extra minutes if coming from cold.
What's the best way to reheat leftovers?
Microwave reheating works, but for best texture, cover with foil and bake at 350°F for 10-15 minutes until fully warmed through. The crispy topping will soften, so always make fresh breadcrumbs for serving. For quick fixes, try a 20-second microwave burst with a damp paper towel over the top to restore some creaminess.
How can I make this dish vegetarian?
Swap the butter for vegan butter and use vegetarian cream cheese (like Kite Hill). For extra richness, add 1/4 cup nutritional yeast to the cheese mix. The recipe stays completely vegetarian while maintaining that creamy texture. Just ensure all cheeses are dairy-free if needed for vegan diets.
What's the secret to extra crispy breadcrumbs?
Toast the breadcrumbs in a dry pan over medium heat for 3-4 minutes before mixing with olive oil. For maximum crunch, spread them on a baking sheet and broil for 2 minutes before adding to the mac and cheese. The key is getting them hot before they hit the sauce—this creates that perfect crackly texture.