
Snacks
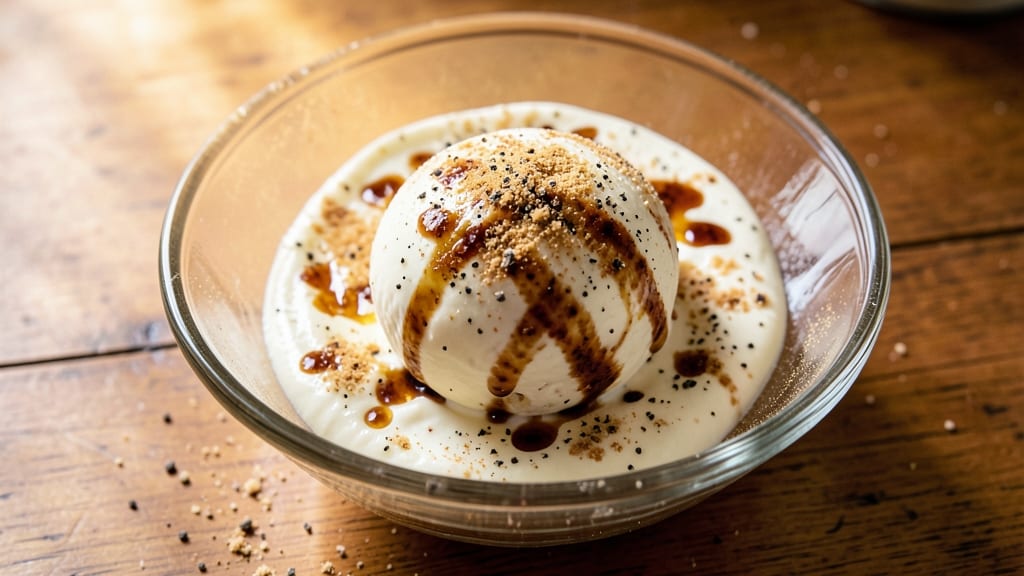
This 70s cheese ball recipe brings back the nostalgic party vibes of decades past—creamy, cheesy, and perfect for gatherings. The classic combination of cream cheese, sharp cheddar, and savory seasonings creates a rich, bite-sized center that’s impossible to resist.
I’ve kept the original charm while making it easy to prepare for modern entertaining.
The secret to a foolproof cheese ball lies in the balance of textures and flavors. Cream cheese provides that signature creaminess, while cheddar adds depth, and a light coating of crushed crackers or nuts gives it that satisfying crunch.
This recipe delivers a crowd-pleasing snack that’s as fun to make as it is to eat.
Once shaped and chilled, you’ll have a party-ready centerpiece that’s perfect for game day, holiday gatherings, or just because. The cheese ball holds its shape beautifully, making it easy to slice and serve—no messy crumbles here. Pair it with a tangy dipping sauce for the ultimate nostalgic touch.
Whether you’re hosting a retro-themed party or just craving a taste of the '70s, this cheese ball is a guaranteed crowd-pleaser. It’s simple to make, packed with flavor, and brings back the joy of classic party snacks. Let’s get started!
Ingredients for 70s cheese ball
Nostalgic party flavors in one creamy, cheesy bite-sized masterpiece—perfect for gatherings!
| Ingredient | Amount | Notes |
|---|---|---|
| Cream Cheese 🧀 | 16 oz | Full-fat, room temperature |
| Sharp Cheddar Cheese 🧀 | 16 oz | Shredded, aged for flavor |
| Worcestershire Sauce 🍶 | 1 tbsp | For savory depth |
| Garlic Powder 🧄 | 1 tsp | Freshly ground preferred |
| Onion Powder 🧅 | 1 tsp | Adds subtle sweetness |
| Black Pepper 🌶️ | ½ tsp | Freshly cracked for bite |
| Dried Mustard 🌿 | ½ tsp | For tangy kick |
| Crushed Ritz Crackers 🍞 | 2 cups | Classic coating texture |
| Chopped Almonds 🥜 | ½ cup | For crunchy contrast |
| Parmesan Cheese 🧀 | ¼ cup | Freshly grated for umami |
| Lemon Juice 🍋 | 1 tsp | Brightens the flavor |
| Butter 🧈 | 1 tbsp | For shaping ease |
The cream cheese is the heart of this recipe—Philadelphia full-fat melts best for that classic 70s texture. Trader Joe's and Whole Foods carry the best blocks for this. Sharp cheddar makes all the difference (avoid pre-shredded—it's full of anti-caking agents). For the Worcestershire, Lea & Perrins is the gold standard, but any good brand works. The garlic and onion powders should be fresh—if they smell musty, toss them. I always toast my spices in a dry pan for 30 seconds before mixing to wake up the flavors.
No Ritz crackers? Saltines or graham crackers work too—just crush them finely. Short on almonds? Pecans or walnuts add a different crunch. The Parmesan can be swapped for Pecorino Romano if you want a sharper bite. If you're feeling adventurous, add 1 tbsp of chopped jalapeños for a spicy kick. For the tangy touch, if you don't have lemon juice, apple cider vinegar at half the amount works in a pinch. The butter helps bind everything together—don't skip it!
This cheese ball keeps beautifully in the fridge for up to 2 weeks if wrapped tightly in plastic wrap. For parties, shape it into a ball and roll it in the cracker mixture, then chill for at least 2 hours to set. You can also make mini cheese balls by scooping the mixture into a piping bag and piping small balls onto a parchment-lined tray. These freeze well for up to 3 months—just thaw overnight in the fridge before serving. The longer it sits, the more intense the flavors get!
Why You'll Love This Recipe
- No Mixing Madness: I swear by this recipe because it’s literally just folding ingredients together—no food processor, no stress. The sharp cheddar and Worcestershire blend into that creamy base like magic, and honestly? You’ll have it shaped in 10 minutes flat.
- Umami Bomb: That Worcestershire sauce—just a splash—transforms this from basic cheese ball to ridiculously good. The garlic and onion powders add this deep, savory punch that makes it taste like a cheesy hug for your taste buds.
- Party Crowd-Pleaser: Serve it at game day, potlucks, or even as a snack for the kids (yes, really). It’s the kind of dish where everyone grabs a piece and comes back for more—no fuss, just pure satisfaction.
- Budget Stretch: Sharp cheddar and cream cheese are cheap staples, and this recipe makes enough to feed a crowd. I’ve made it for under $8 total, and it lasts in the fridge for weeks—perfect for when you’re broke but still want to impress.
Step-by-step instructions for 70s cheese ball recipe
Here's how to make the ultimate retro party appetizer that's always a crowd-pleaser.
Mix the Cream Cheese Base
In a large mixing bowl, combine the 16 oz cream cheese and 16 oz sharp cheddar cheese. I like to use a hand mixer for this step—it makes blending the cheeses much easier. Beat on medium speed for about 2-3 minutes until the mixture is completely smooth and creamy. You'll know it's ready when there are no more lumps and the texture looks uniform.
This is where the magic starts. The cream cheese should be at room temperature (not cold from the fridge) to blend perfectly with the cheddar. If it's too soft, chill the bowl for 10 minutes before starting. Once smooth, add the 1 tbsp Worcestershire sauce, 1 tsp garlic powder, 1 tsp onion powder, 0.5 tsp black pepper, 0.5 tsp dried mustard, and 1 tsp lemon juice. Mix well until all the seasonings are fully incorporated—you should smell that savory, tangy aroma developing.
Shape the Cheese Ball
Line a small bowl with plastic wrap, making sure it extends over the sides for easy removal. Scoop the cheese mixture into the bowl and use your hands to shape it into a smooth ball. I like to wet my hands slightly with water to prevent sticking—this makes the shaping process much easier. Press gently but firmly to create a compact ball with no cracks.
For the perfect finish, I roll the cheese ball in the 1 tbsp butter first. This creates a smooth, golden surface that looks amazing and makes the cracker coating stick perfectly. Then, roll it in the 0.25 cup Parmesan cheese to give it that classic retro look. Place the shaped ball in the fridge to firm up for at least 30 minutes—this helps it hold its shape when you add the crackers.
Coat with Crackers and Almonds
After the cheese ball has chilled, remove it from the fridge and carefully peel back the plastic wrap. Spread the 2 cups crushed Ritz crackers on a large plate and roll the cheese ball in them until completely covered. Press gently to help the crackers adhere, but don't pack them too tightly or they'll make the ball too hard to cut later.
Next, roll the cracker-coated ball in the 0.5 cup chopped almonds. The almonds add a wonderful crunchy contrast to the creamy cheese and buttery crackers. Press them lightly into the cracker coating so they stick well. For extra flair, I like to press a few extra almonds into the top of the ball to create a decorative pattern—it makes the finished cheese ball look even more impressive.
Chill and Slice for Serving
Return the fully coated cheese ball to the fridge and let it chill for at least 1 hour before serving. This final chilling step is crucial—it allows all the flavors to meld together and makes the cracker coating set properly. The longer it chills, the better the texture will be when you cut into it.
When you're ready to serve, use a sharp knife to cut the cheese ball into 1-inch thick slices. I like to dip the knife in warm water between cuts to prevent sticking. Serve immediately with toothpicks for easy handling. The contrast of creamy cheese, buttery crackers, and crunchy almonds makes every bite irresistible—perfect for any party spread or holiday gathering.
Pro Tips For Making 70s Cheese Ball
- Mix Room-Temp Cheese: I learned this the hard way—cold cream cheese and cheddar will turn your cheese ball into a greasy, clumpy mess. Let both sit out for 30 minutes before blending, or run them under warm water for 10 seconds to soften. Trust me, your hands (and the mixer) will thank you.
- Use Sharp Cheddar: Skip the mild cheddar—this recipe demands sharp. The tang and bite cut through the creaminess, balancing the Worcestershire’s funk. If you’re stuck with mild, add ½ teaspoon extra garlic powder to compensate.
- Don’t Overmix: After 2 minutes in the food processor, stop. Overworking the cheese turns it pasty and oily. Pulse just until combined, then fold in the Worcestershire by hand—this keeps the texture creamy, not greasy.
- Chill Before Rolling: Warm cheese ball = sticky disaster. Press the mixture into a ball, wrap it tightly in plastic, and refrigerate for at least 1 hour. This firms it up enough to roll in seasoned nuts or cracker crumbs without falling apart. (Yes, even if you’re impatient like me.)
Wine and beer pairings for this 70s cheese ball
Classic Wine Pairings
A crisp, dry white wine like Chardonnay from California or Sauvignon Blanc from New Zealand complements the creamy richness of this cheese ball beautifully. The acidity cuts through the fat, cleansing your palate between bites.
I love a La Crema Sonoma Coast Chardonnay—its bright citrus notes balance the savory cheddar perfectly. 🍷
For a red wine option, try a light-bodied Pinot Noir from Oregon or Beaujolais from France. The delicate fruit flavors won’t overpower the cheese while adding a sophisticated touch. Avoid heavy reds like Cabernet Sauvignon—they’ll clash with the cracker crunch.
Beer Complements
A light lager like Peroni or Heineken is my go-to beer pairing—its crisp, clean finish refreshes your palate after each bite.
For something with a bit more character, try a Belgian witbier like Hoegaarden, which adds a subtle citrus note that pairs wonderfully with the lemon juice in the cheese ball. 🍺
If you prefer something darker, a wheat beer with a hint of spice, like Blue Moon, works surprisingly well. The slight sweetness enhances the caramelized cracker coating without overwhelming the cheese flavors.
Unexpected Cocktail Pairings
For a fun twist, serve this cheese ball with a Manhattan cocktail—the whiskey’s warmth and sweet vermouth complement the sharp cheddar and Worcestershire sauce. I like to make a batch of Rittenhouse Rye Manhattan (rye whiskey, sweet vermouth, and Angostura bitters) for a sophisticated touch.
A dry martini (gin, dry vermouth, and olives) also works beautifully. The herbal notes of the gin cut through the richness, making each bite feel fresh. Skip the olive garnish if you want to keep things simple—just serve the martini on the side.
Non-Alcoholic Options
For non-drinkers, a sparkling apple cider like Martinelli’s adds a festive touch without alcohol. The effervescence cleanses the palate, and the apple notes pair surprisingly well with the almonds and crackers. 🍎
Try a ginger beer like Feather’s for a spicy kick that contrasts nicely with the creamy cheese. The ginger’s warmth enhances the black pepper and garlic powder in the recipe, adding a whole new dimension to each bite.
Nutrition facts
Frequently asked questions
Can I make this cheese ball without Ritz crackers?
While Ritz crackers give that classic 70s texture, you can substitute with 2 cups of finely crushed saltines or graham crackers for a similar crunch. For a gluten-free option, use crushed gluten-free crackers or even toasted coconut flakes mixed with crushed nuts for a tropical twist.
Why does my cheese ball keep falling apart when I cut it?
This usually happens if the cheese mixture wasn't chilled long enough before coating. Let the shaped ball firm up in the fridge for at least 2 hours (overnight is best) before adding crackers. Also, make sure your cream cheese and cheddar are fully blended—any lumps can create weak spots. For extra stability, add 1 extra tablespoon of butter when shaping.
Can I make mini cheese balls instead of one large one?
Yes! Divide the cheese mixture into 1-inch balls using a cookie scoop or spoon. Roll each in crackers and almonds, then chill on a tray for 1 hour. These freeze beautifully for up to 3 months—just thaw in the fridge before serving. Mini versions are perfect for cocktail parties or as a fun snack board centerpiece.
What's the best way to store leftovers?
Wrap the cheese ball tightly in plastic wrap and store in an airtight container in the fridge for up to 2 weeks. For longer storage, freeze individual slices wrapped in parchment paper for up to 2 months. Thaw overnight in the fridge—never at room temperature—to preserve texture. The flavors actually improve with time, making it perfect for last-minute gatherings!
How can I make this recipe vegetarian or vegan?
For vegetarian, use vegetarian-friendly cheddar and ensure Worcestershire sauce contains no anchovies. For fully vegan, swap cream cheese for vegan cream cheesestrong> (like Kite Hill) and cheddar for vegan cheddar shredsstrong> (like Violife). Add 1 tbsp nutritional yeast**strong> for that cheesy depth. The texture will be slightly different but still delicious!